
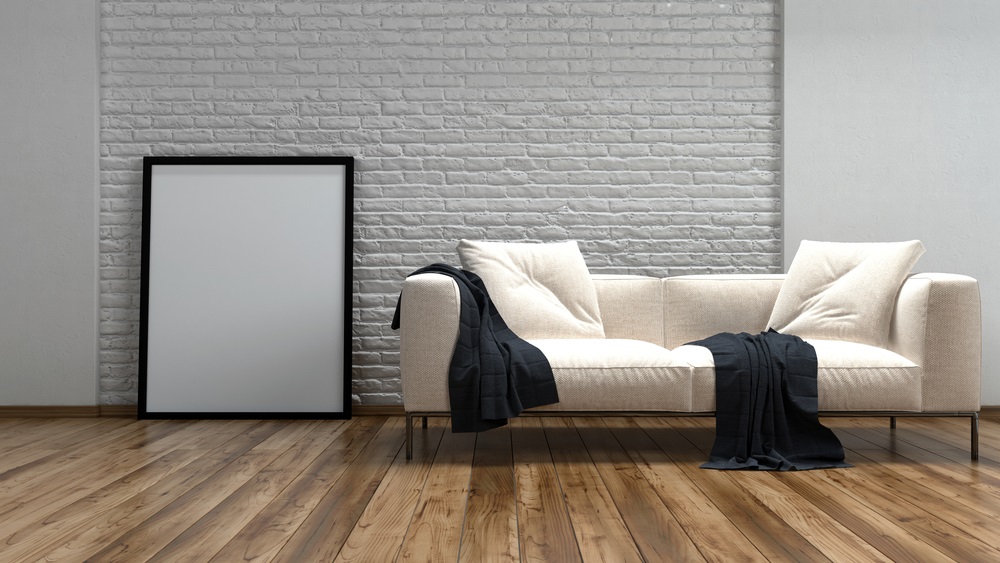
Your floor takes a lot of abuse over the years. Dirt, spills, scuffs, all these things can take a toll on your floors no matter what they are made of. One of the best ways to make your floors last is to clean them. There are right ways and wrong ways to clean your floors, though. Even the best-intentioned homeowner can damage a floor by using the improper cleaning technique.
Not every floor is cleaned the same way. Each type of flooring has unique aspects that require different methods and solutions to address. What will make one-floor sparkle and shine, can strip the finish off of another, Homeowners should always be careful to learn how their floors should be cleaned.
The information provided below is the comprehensive guide to cleaning the most common types of flooring. If you have some specialty flooring, adapt what is closest, and always check the manufacturer’s website for specific guidelines.
How to Maintain, Clean, and Refinish Hardwood Floors
How to keep them clean
Keeping your hardwood floors clean is the first step in making them last. The cleaner you can keep your floor the less you will have to worry about how to clean them properly. Take some proactive measures, and you can save yourself some effort later.
To keep hardwood floors clean your best friend can be rugs. Put a welcome mat outside exterior doors, and these will knock a little of the debris off of people’s shoes before they enter your home. On the interior rugs can help in high traffic areas. Used judiciously area rugs can help protect the surface of the floor.
One of the main ways to keep your hardwood floor clean is to take off your shoes. Shoes collect dirt, and grime, and spread it over the floor inside your home. Make a habit of taking your shoes off after you get into your home. Leave some warm slippers by the door and change into them and you can save yourself a bit of cleaning time.
Best way to clean them
The first step in keeping hardwood floors clean is to dust and sweep them daily. Doing this will take up the small particles that can scratch the surface of your floor. The best thing to use is a microfiber style cleaning pad. These take up the smaller particles better instead of just pushing things around.
Once a week your hardwood floor cleaning procedure should include mopping the floor. Wet mops get the dirt off of the floor that even microfiber cleaning pads can’t get. A good vacuum can also be helpful. Make sure that the roller doesn’t reach the floor, or it will scratch the surface.
Have my floors been sealed?
Knowing your hardwood is the key to cleaning it properly. How you clean your floor will greatly depend on which of the two main categories that your floor falls into. Hardwood floors normally are “sealed” or “unsealed.” This designation depends on if they have a penetrating finish, a surface finish, or both.
A “penetrating finish” is where the wood absorbs the finish. The wood is then treated with a floor wax which protects the underlying wood. A surface finish is usually acrylic, or polyurethane and completely seals the underlying wood. These finishes are usually how prefinished hardwood and engineered hardwood comes.
There are a couple of methods to quickly determine if your hardwood is sealed. In the first method, simply run your hand over the surface of the wood. If you can feel the grain of the wood, then your floor has a penetrative finish. To determine if your floor is sealed with acrylic you can use a knife and attempt to take up a very small piece by shaving some off.
To see if your floor finish is still working put a few drops of water in an inconspicuous spot on the floor, if the water beads then it is a sealed floor. If the water beads but the underlying wood darkens, that means the finish is only partially doing the job. Of course, if the water is immediately absorbed your floor has no finish and will likely need to be refinished.
How Do I Clean Them if They Have Been Sealed?
Cleaning a refinished hardwood floor is something that requires a bit of special care and handling. The refinishing process takes an old or damaged floor and returns it to a like new appearance. New finishes can take up to a week to completely dry, and the floor if vulnerable in this period of time.
Begin sweeping the floor after 24 hours have passed. Use a soft dust mop type of broom. Microfiber is the best choice. Choosing a microfiber mop will help prevent dust from adhering to the floor. Do not mop the floor or use any cleaner during this period. Cleaners can be absorbed into the finish and leave it dull.
You may begin cleaning your hardwood floor after a week. Avoid using soap and water on your floor for awhile still. Make sure you clean up any spills as quickly as possible until the floor is completely cured.
Taking Steps to Avoid Damaging Them
The first step to cleaning your hardwood floors safely is to sweep them. This removes the large surface debris that could scratch the surface. Once this is completed use a dust mop to pick up any small particles that the broom missed. Once the floor has been swept and dusted, you can then use a damp mop to clean the floor. Mop the floor in the direction of the grain of the floor. Use a small amount of dish soap or some other non-abrasive cleaning substance on the flooring.
For stubborn stains or grease make sure to use a hardwood safe cleaning solution. To take up, scuffs use a bit of baking soda on a sponge or a tennis ball for scuffs that don’t seem so stubborn. Commercially available cleaning solutions should not be overly abrasive or acidic, or your risk of dulling the finish of your floor is much higher.
The last step to cleaning your hardwood floors without damaging them is to use a soft, clean cloth to buff the surface of the floor. This final step should be enough to bring back the shine to your floor safely. If your floor is still dull and lackluster looking after completing this process then redo the process. If this step fails, consider refinishing the floor or using a specialized polishing compound on your flooring.
Can you use a mop and water?
Hardwood floors can be mopped with water if you are careful. A traditional bucket and mop should never be used on a hardwood floor. This amount of water can be dangerous for any hardwood flooring. Mopping hardwood floors with water should only be done with a damp mop, never use enough water to leave a puddle. Even the best-sealed floors can have small gaps that will allow moisture to get under the flooring.
Moisture that gets under the floor can cause the flooring to warp. While mopping, also avoid getting water to the edge of the floor where it may get to the edges of the boards under the baseboards. Even a small amount of water that gets to the end of one of the flooring boards can cause the board to swell and damage the flooring.
What is the best mop to use?
The best mop for hardwood floors is always going to be the least abrasive option. A microfiber mop is the best option you can choose for your hardwood flooring. The best mop for hardwood floors is a multi-strand mop that allows you to get into the corners of your room. This type of mop will reduce the build up that can otherwise naturally occur in the places a mop may not reach.
Microfiber is the best choice due to the intrinsic properties of microfiber. Microfiber is a man-made cloth that can attract and keep dust. Using microfiber helps by picking up as much of the small particles from your flooring as possible, keeping them from scuffing the floor. Even mops made of microfiber do a better job than those made of cotton or any other material.
How to mop them?
Mopping your hardwood floor isn’t something that has to be difficult. With a little bit of care and effort, your hardwood floor can end up looking shiny and as good as new. The first thing to know about how to mop hardwood floors is that you can’t use the same technique as you would mop a floor made of vinyl. When mopping a hardwood floor you use as little water as possible. Water can damage your floors so must be used sparingly. usually just spread the particles of dirt around and leave your floor looking duller than it has to be. To get your floor looking its best, you should use specialized cleaning solutions designed for hardwood floors. Most hardwood manufacturers sell solutions designed to clean their own floors best. While more expensive than homemade options they are often the better choice for those who are not into do it yourself projects. No matter your choice avoid water and vinegar mixtures as they can strip off some shine from your floor.
Usually, water just spreads the particles of dirt around and leave your floor looking duller than it has to be. To get your floor looking its best, you should use specialized cleaning solutions designed for hardwood floors. Most hardwood manufacturers sell solutions designed to clean their own floors best. While more expensive than homemade options they are often the better choice for those who are not into do it yourself projects. No matter your choice avoid water and vinegar mixtures as they can strip off some shine from your floor.
Mop the hardwood floor by making your mop strokes with the grain of the wood. By going with the grain of the wood you reduce the chance of small particles being trapped as the mop moves across the ridges of the wood grain.
When mopping start at the farthest point and work your way back to where you are going to exit the room. Doing this will make sure you don’t have to walk over the newly mopped flooring.
As you are mopping your floor make sure to use clean water. If you have a lot of flooring to mop, changing the water occasionally will ensure that you are not just spreading dirty water around on your floor. It is normal for the water to become cloudy as you mop, however, if the water should become so cloudy that you can’t see through it then it is time to change the water.
Once the mopping is done, the best way to make your floor as shiny as possible is to dry it with a soft cloth. Drying the floor rather than let it air dry will take up any small particles that may be left. This drying and buffing is the same sort of thing you would do for your car, and the results should be just impressive if done right.
Natural homemade cleaners
There are a lot of different natural hardwood floor cleaner solutions. Almost all of the cleaners you make at home are made of a diluted vinegar solution. While a vinegar solution does work, it does tend to have a strong odor until the vinegar dries. The scent of the vinegar may linger unless you are able to air out the room as you clean. If you end up deciding to use a vinegar based solution never use it full strength and always rinse your floor immediately after with clear water to avoid it stripping the shine from your surface.
Surface Sealed Floors
- Water and Dish Detergent
- One of the best more naturally based hardwood floor cleaners is 1/4 cup of mild liquid dishwashing soap added to a bucket of warm water. You should rinse this with clear water when you are done and dry with a soft cloth.
- Oil and Vinegar
- Mix equal parts
- olive oil
- white household vinegar.
- Add a tsp of essential oil if desired for fragrance
- Mix equal parts
- Tea and Water
- Add boiling water and two tea bags to create a cleaner that also leaves a nice shine to your hardwood flooring.
- Combination Cleaner
Home remedies to help fix issues
There are many different things that can happen to your hardwood floor. Each day can bring different and unique problems that you have to be able to address. Every day scuffs and scratches will happen to even the most careful homeowner. Luckily, there are simple methods to take care of most of the problems that happen to your hardwood floors.
Scuffs: The main goal to get rid of scuffs is to remove the scuff mark without damaging the finish of your floor.
- One of the best ways to get scuff marks off of your floor is to use a tennis ball. Using a sharp knife cut an opening large enough for a broom handle and place the tennis ball on the end. Firmly, but not forcefully, use the tennis ball to rub the scuff mark off.
- Another way to remove scuff marks from your flooring is to use a large pink eraser. Make sure it is an unused eraser and use as little pressure as possible to remove the scuff from the hardwood.
- WD-40 can be used to dissolve scuffs. The main issue with WD-40 is that unless you make sure to wipe it up very carefully or the area of the floor you use it on can become as slippery as an ice skating rink.
- Household eraser pads are a more modern way to remove scuffs from your floor. These pads are very mild abrasives and can take up a scuff mark without damaging the finish of your floor. Repeated use can still dull the finish of your floor however.
- Fine steel wool is one of the riskiest ways to get a scuff off of your hardwood flooring. While this will remove even the worst scuff mark from your flooring, it will also take off the shine from the hardwood flooring.
Stains: Stains can be almost impossible to get out of hardwood flooring. Surface stains can be addressed by one of the methods below. Deeper stains will require either sanding and refinishing or if deep enough the replacement of the stained boards.
- Hydrogen peroxide can often take out minor surface stains. Soak a rag in hydrogen peroxide, place the rag over the stain and draw out some of the stain, if possible. As with water don’t allow the hydrogen to puddle or get between the boards. Hydrogen peroxide will bleach the wood as well, and this will cause discoloration on dark stains.
- Bleach will take out stubborn stains but will definitely bleach the stain of your hardwood flooring as well. If the stain is small and in an inconspicuous area this might be acceptable. Do not use bleach on dark stained floors or you will have discolored areas.
Tape Marks: Tape can be a great help in your home, it can also be something that causes problems for your hardwood flooring. Tape residue on your hardwood floor can be something very difficult to handle. The more that you scrape tape residue the more you can simply spread it around and make a larger mess. Luckily there are several options that will take up the tape residue and leave your floor looking great again.
- Baking soda can be a life saver for tape marks. To get the sticky residue off of the floor begin by making a paste from adding 2 tablespoons of baking soda to 1/2 teaspoon of water. Spread the paste over the residue and allow to dry for around 10 minutes. Once dry rub the paste to clear the paste and reside together. Repeat if necessary until all residue is gone.
- Mineral oil can be used to take up tape residue. Saturate a white lint free cloth with mineral oil and use it to soak the residue. Use fingertips to work the residue from the flooring.
- There are a couple commercial products specifically targeted to remove tape residue. Check the warning label before using these on hardwood flooring. A citrus based product is safer than other types of commercial products.
Scratches: Over the years it is almost unavoidable that your floor will get a scratch or two. Repairing the damage can save you thousands on new flooring.
- Stain Markers: Shallow scratches can sometimes be easily addressed with a wood staining marker. Select the right shade for your floor and if possible test on an inconspicuous area to ensure the stain dries to the same color as the existing flooring. Use a cloth instead of putting the stain marker directly on the flooring to avoid making the new stain darker than the flooring.
- Resealing: For scratches that don’t cut through to the floor itself try to reseal the wood before more damage occurs. Clean the area thoroughly and then apply a protective finish to the scratch with a thin tipped brush.
- Surface Sanding: Deep scratches might require a bit more effort. To fix deeper scratches you may need to sand an area, stain it again, and reseal the floor. This is normally a job for a professional but is something you can do on your own sometimes.
- Clean the area to make sure that all dust and dirt is clear.
- Gently sand the scratch with fine steel wool, making sure to blend the sanding area into the surrounding wood. Use a damp cloth to remove residue.
- Deep scratches may require a wood filler, stain to match. Light scratches can usually just be sanded to blend into the floor and the flooring stained to match if there is discoloration.
- Reseal the floor with the same finish as the rest of your flooring.
How to get wax off
Wax is a great way to make a floor shine. Sometimes the wrong type of wax is on your floor, and you need to remove it. Also, even the best waxes will eventually dull, turn yellow, and make your floor look bad.
Spills: Removing candle wax and other types of wax spills is fairly straightforward. Wait until the wax cools and hardens and then scrape off the wax with a flat object like a credit card. Avoid knives with serrated or curved edges. Often butter knives have a rough edge that should be avoided. Be careful not to scratch the finish of your hardwood flooring. Remove the residue by heating it with a hairdryer and buffing clean with a lint free cloth.
Wax Buildup: Wax can give a hardwood floor the shine that you want. Over the years this wax can build up and instead of giving you a great shine, the wax can yellow and dull. Fixing this requires removing all of the wax on the floor and starting from scratch.
- Use odorless mineral spirits to dissolve old wax and remove it. Using a rag clean the floor a section at a time. Clean with the grain of the wood and make sure to work into the grooves of the floor.
- When the rag comes away clean go over the wood lightly with a piece of fine steel wool soaked in mineral spirits. This will take up any remaining wax that resisted the mineral spirits alone.
- Finish by mopping the floor with hot water, avoid any standing water on your floor.
How to restore the shine
Over time your floors will lose their shine. Hardwood floors will become dull as years go by and will need to have the shine restored to them. The best way would be to completely refinish all of your floors. Sometimes this is impractical or just too much work, and another option is necessary.
There are several refinishing products on the market that can be mopped onto the floor that will bring back a glossy coat. Always check with the manufacturer of your floors, if known, and use what they recommend. If you don’t know then you must experiment to find the best option for your floor.
When experimenting with refinishing compounds always test on smaller areas. This lets you see the results without having to undo an entire room. Not every refinishing compound will work for every floor. Don’t be discouraged if you have to go through a couple of different brands to get the shine you were looking for.
Always thoroughly clean your hardwood before you try any refinishing compounds. Starting with a clean floor makes sure that you don’t seal dust and debris into the new finishes. Another way to ensure your floor comes out as shiny as possible is to buff dry the floor when you are done.
Deep cleaning
Sometimes your hardwood floor needs a deep cleaning. Sweeping and mopping does a great job for everyday cleaning but after awhile your hardwood needs a little more attention. Deep cleaning your hardwood floor is a more involved process than your daily cleaning, but will help your floor finish last as long as possible.
Deep cleaning hardwood floors is something that is typically done by a professional. They have the right equipment to do the job where doing it on your own is much more challenging. The process for deep cleaning hardwood floors is the same if you pay a professional or do it yourself.
If you decide to deep clean your hardwood yourself, be prepared for a lot of time on your hands and knees. Much of the work is detail work, and the work that isn’t detail type work requires a bit of force that most Swiffer type brooms just won’t provide.
- The floor is swept and dust mopped to remove surface debris.
- Floor vents are removed to all the floor to be cleaned underneath the flange of the vent.
- Baseboards are cleaned by hand.
- Any surface debris such as wax and tape residue are removed.
- Edges and corners are cleaned by hand with hardwood floor cleaner.
- The main floor is cleaned, ideally with a high-speed buffer brush. If done by hand this is best done with a specialized mop pad that gives some abrasion without enough to dull the finish.
- The floor is mopped again with a wood cleaner to remove any residue.
- The floor is then buff dried to avoid any streaks.
Removing Oil
The key to removing oil from hardwood flooring is speed. Leaving oil on your hardwood flooring will quickly lead to a stain that can be impossible to take care of on your own. The quality of your floors finish will decide how quickly you must act. To remove oil from your hardwood floor try the following
- Use a paper towel or rag to take up as much of the oil as possible. DO NOT rub or scrub at the oil on your floor. Place the rag or paper towel on the flooring and blot lightly at the oil to take up as much as you can. Scrubbing at the oil can force it more deeply into the wood.
- Cover the oil stain with flour or cornstarch. Use enough so you can not see the flooring through the powder. Allow this to sit for at least an hour and then sweep or vacuum it up.
- Mix 1 tsp of mild dish soap into 3 cups of water. Using a clean rag dampen the rag and wipe the area repeatedly with the rag, rinsing the rag often.
- If this does not have much of an effect you can use mineral spirits to attempt to remove the stain. This may require you to renew the sealant on your flooring depending on your floor finish.
- Ensure that the floor is dry when complete.
Caring for and Maintaining
The best maintenance schedule for hardwood flooring
- Sweep or dust mop daily
- Use a vacuum one weekly using the bare floor setting
- Once a month clean with the cleaner recommended for your floor
- Add a new coat every 3-5 years
- Every 10 years sand and refinish your hardwood floors.
Tips for caring for your hardwood flooring
- Only use cleaning products designed for hardwood floors, avoid using cleaners intended for vinyl or tile floors.
- Place throw rugs at the entrances to catch debris that can cause scratches.
- Avoid steam mopping the floor. Steam can cause the wood to swell.
- Always wipe up spills as quickly as possible.
- Use less wax in lower traffic areas. Places like under tables or in corners may only need to be waxed every other time.
- Place floor protectors on the legs of chairs and tables to reduce the chance of them scratching the floor. Replace the pads if they become dirty or embedded with debris.
- Don’t walk on the floor with cleats, or high heels with metallic pads. Shoes can also have rocks stuck in the tread which can damage your floors.
- Do not slide furniture when you move it, use a furniture cart or lift it off of the floor.
- Place an area rug in front of the sink, and refrigerator to catch spills that may happen.
- Keep your pet’s nails trimmed and paws clean to reduce scratches.
- Use window covering to prevent UV damage to the floor which can cause fading.
Best cleaning products
In most cases, the best cleaning product for your hardwood floor is the one that your manufacturer recommends. There are many different kinds of hardwood floor cleaning products on the market. The best cleaners on the market have a proven track record for keeping floors clean. Not every cleaner is the best for every floor, and you may have to look at several before finding the one that works for your floor.
- Bona Hardwood Floor Care System ($30): Bona is the most popular hardwood floor cleaner on the market. The floor care system comes with a mop, mopheads, and spray bottles of solution. It is a one stop shop for hardwood floor cleaning.
- Orange Glo Everyday Cleaner ($12): Orange Glo is a water based cleaner that is premixed for ease of use. Orange Glo comes in a spray bottle, without a mop. However, Orange Glo is also good for other types of wood surfaces such as cabinets and paneling.
- Pledge FloorCare Wood Squirt & Mop ($10): For large areas this is often the best choice. It is also premixed, the bottle has a larger opening allowing you to put the cleaner on a larger area in much less time.
- Shark Sonic Duo Carpet and Hard Floor Cleaner ($180): The Shark Sonic Duo Carpet and Hard Floor Cleaner is the most expensive option, but it does a fantastic job. The system cleans at 1,000 scrubs per minute to take up the most dirt and debris. The scrubbing pads are not overly abrasive and are safe for hardwood floors.
Easiest way to clean to keep them clean
The easiest way to clean hardwood floors is to simply sweep the floor and then mop it with a damp mop. The most important part of the process is how well you sweep. Use a microfiber dust mop and ensure you get all of the dirt and debris from your floor. Once this is completed you can use a damp mop with a good cleaner to make the job easier. A Swiffer or Bona mop can simplify the task by combining your spray bottle and mop into one easy tool.
Naturally Disinfecting
Sometimes you need to ensure your floor is sanitized. This could be due to a spill, or allergies. Whatever the reason, disinfecting your floor goes beyond the standard cleaning procedure and requires a bit more effort. The method used to disinfect your floor will be mainly determined by the type of finish on your hardwood.
Polyurethane Sealed Flooring
For polyurethane sealed flooring you can use a steam mop to naturally disinfect your flooring. Do your regular floor cleaning before using a steam mop. Be careful the steam is hot enough to scald. Make sure to move the mop at a good pace to avoid the steam getting into the seams between wooden planks if you have engineered hardwood. Steam mopping should only be done occasionally to prevent damage to the floor.
Non-Polyurethane Sealants or Unsealed Flooring
The natural way to disinfect your hardwood floor is using vinegar and water. Clean the floor normally as a first step. Follow up a thorough cleaning with damp mopping with a solution of 1/2 cup of vinegar to a gallon of warm water.
Can you use bleach?
Using bleach on a hardwood floor is possible, but dangerous. Floors that are not entirely sealed will have discoloration happen if you use bleach. Any bleach use should be very diluted to avoid this discoloration from occurring. So, while you can use bleach, doing so is a risky endeavor that can leave you your floor with lighter patches.
Polishing your floor
Polishing a hardwood floor is often a time-consuming process. Polishing your floor properly takes some effort, but the shine your floor has at the end of the process is worth the effort. There are some products that can help you get your floor polished fast though. The process to polish your floor is;
- Determine the finish on your hardwood floor. Polishes for surface sealed flooring and polyurethane coatings are different.
- Take out as much furniture as possible, be careful not to scratch your floor while moving the furniture. If you are doing this alone take advantage of furniture pads or special sliding pads that can let you easily move the furniture without damage.
- Deep clean your floor to make sure you don’t seal dirt or debris into the polish.
- Select the proper polish for your floor. If you are unsure of your flooring, test polish on a small inconspicuous area.
- Apply polish to the floor according to product directions. Take the time to apply the polish evenly over the entire surface of your floor.
- When applying the polish make sure to work your way through the room so that you leave yourself an exit. Work from the farthest point towards the door.
- Allow the floor to dry completely, reapply the wax if one coat is not enough of shine.
- Return the furniture with the same care that you took removing the furniture from the room.
Best way to dust
Dusting your hardwood floor helps to maintain the shine and luster. The best way to dust your hardwood floor is to use a microfiber dust mop. Microfiber dust pads are made to attract and keep dust. When dusting your hardwood floor make sure to dust the corners and underneath
When dusting your hardwood floor make sure to dust the corners and underneath objects. Dusting only the high traffic areas will lead to dust and debris piling up underneath tables and in corners. Use a Swiffer type dust mop, and use a microfiber cloth to get the corners.
Dealing With Old Floors
Old wooden floors can accumulate layers and layers of wax over the years. To have a clean looking old hardwood floor takes some extra effort. The best result would be refinishing the floor, but that is not always possible. Not being able to refinish your floor means you have to do the best you can to strip away all those layers of old wax and polish and start fresh.
Old hardwood flooring can be cleaned best by first sweeping and dusting your floor. When you have done this, you should deep clean the floor several times, taking care not to remove the actual finish of your hardwood.
While new hardwood floors can usually be brought back to a shine with a single deep cleaning, most older floors have years of traffic to clean up. It may take several deep cleaning efforts to get out the ground in dirt from years of traffic.
What to Do When You Have Pets
Pets can be important members of your family. Pets can also be really hard on your floors. Hardwood floors are no exception to this and can be damaged by your pets. From scratches to stains from food or urine your pets can take your floor from fabulous to flawed. Luckily with some forethought and effort you can keep your hardwood floors clean with pets in your house.
Plan ahead for your pets and you can avoid a lot of the damage to your hardwood flooring. These are just some of the tips to help you keep your floors looking great.
- Place rugs at the entrances and in front of any pet door into your home to catch the debris that they bring in.
- Try to allow your pet time to shake water off outside before bringing them in. If you have a garage bring them in through the garage to allow time for your pet to get rid of the worst of the wet fur problem.
- Place rubber mats around food and water dishes, large enough to catch spills. This will depend on the size of your pet. A large breed of dog needs a bigger “mess” catcher than a small cat will.
- Take the time to train dogs to wait till they can go outside to use the bathroom. For young pets still being trained make sure to have absorbent mats in place that are capable of keeping urine from reaching your floor.
- Alway make sure to wipe up any spills as soon as possible. The longer they sit, the more damage they can do.
- Keep your pets nail’s trimmed to avoid damaging the finish of your hardwood.
- Even small pets can have sharp nails that scratch the finish of your flooring. Avoid games that send your dog running across the floor. Running and stopping are the most damaging activities your pets nails will do.
- If you have flooring that is not hardwood, use these areas for your pet if possible. Vinyl can be more forgiving than the finish of a hardwood floor.
- Remove any rug that a pet urinates on, this can keep the urine from drying out and in contact with your floor finish. Also, if a pet has urinated somewhere in the home, it is much more likely they will do so in the same spot again.
- If there is pet urine that has stood for over 2 or 3 hours, use some vinegar on the spot. The vinegar is an acid which will help neutralize the ammonia. Wipe up both liquids and then allow the area to fully dry before doing anything with your floor.
- Minimize pet hair by keeping your animal groomed. Grooming will reduce the amount of hair that ends up on your hardwood. If you have a pet that sheds a lot, consider investing in a vacuum instead of sweeping up.
Scrubbing With Care
Scrubbing on your hardwood floor is something that must be done with great care. Your hardwood finish can be damaged if you use the wrong substance on your floor. You should only scrub your floor if it is necessary, routine scrubbing of any hardwood floor is not recommended. Scrubbing your floor with abrasives will take the finish off of your hardwood.
If you have a surface issue that needs to be taken care of, use the least abrasive substance possible. Your goal should be taking care of the problem with as little damage to your floor finish as possible. Instead of going for the most abrasive substance and bristles possible, start from the softer options and see if they work first. Always use the least amount of force possible to clean up the mess.
Can you vacuum?
Hardwood floors can be vacuumed as long as you use some care. Vacuums can be great on hardwood floors, as it can take up small dust and debris that a broom would miss. The most important thing to remember when using a vacuum is that the beater bar of the vacuum should never touch the flooring.
Most vacuums are constructed with hard bristles that rotate on a cylinder. These bristles will damage a floor finish if allowed to come in contact with the floor finish. A lot of vacuums have bare floor settings, though, and so are safe to be used on hardwood floors. The bare floor setting moves the bristle brush off of the surface of the floor.
Best electric broom
New models of electric brooms come out each year, these hand held vacuums are designed for ease of use and portability. Each model brings new and different technologies that can help keep your floor clean. When considering electric brooms there are some ways to decide if this year’s new model is the best electric broom for wood floors. When considering what the best electric broom is the following points will help you make the best decision.
- Weight: The reason to choose an electric broom is portability. The weight of your electric broom is what determines if it is portable. The heavier your electric broom is, the harder it is going to be to pick it up and move it around easily.
- Cordless: While they do make corded electric brooms they are usually not the best choice. One of the main reasons to get an electric broom is the ability to move it around quickly. This means the best electric broom for hardwood floors are those that are cordless. Battery life becomes the main selling point as you consider your cordless broom.
- Suction: Your electric broom has to have enough suction to do the job. Often a cheaper model doesn’t have the power to actually be useful. This is often balanced against the battery life. The more suction the less time most vacuums are able to run on battery power. Ideally, you will find a vacuum that has a rating of around 120cfm (cubic feet per minute).
- Floor Impact: Another key aspect for the choice of an electric broom is how safe it is for your flooring.The best electric brooms don’t even touch your floor and instead have a felt pad cushioning it. If it does have wheels make sure the plastic is hard enough not to leave tracks on your flooring.
Cleaning machines
Hardwood floor cleaning machines are specifically designed to clean hardwood. This is different than just being a hard surface cleaner. Hardwood floor cleaners use a softer bristle than those designed for vinyl or other surfaces. The best hardwood floor cleaning machines will leave your hardwood floor much cleaner than doing it by hand.
- Bristles: Bristles in any hardwood scrubbing machine must be firm enough to clean, while not stripping your finish or causing scratches. Examine any documentation to be sure it is not meant for concrete or another more durable surface.
- Water: Your hardwood floor cleaner needs to have a good water management system. The cleaner should have a powerful and fast enough cleaning system that any water is not allowed to form puddles or remain on the surface except the brief instant of cleaning. Cleaners without powerful enough suction systems are not useable on hardwood floors due to the possibility of damaging the wood through moisture intrustion.
- Portability: When considering a hardwood floor cleaning machine think about how portable it is. If you live on one floor you can go with a heavier model. If you have three floors of hardwood to clean then the weight of your hardwood floor cleaner becomes a much larger consideration. Ask to lift up the floor model and make sure it isn’t too heavy for you to move around easily.
- Power: The best hardwood cleaners are going to be ones that are not battery operated. Good floor cleaning requires too much power to be handled by a battery. Cheaper models may advertise that they are cordless and these do an acceptable job, however, the best will have a cord. The cord on these models should be long enough to be useful and durable enough that they don’t fall apart from use.
DIY Guide on Sanding
Sometimes no matter how much cleaning you do your floor won’t come clean. Or perhaps your floor gets damaged despite every caution. In these situations, you may have no other option but to sand your hardwood floor. Most of the time it is going to be something you should let a professional do. However, if you are enterprising enough, careful enough, and brave enough, you can sand your hardwood floor yourself. Here are some DIY steps to guide you on sanding hardwood floors.
Preparation: The old adage of “Be Prepared” never leads you down a wrong street. Make sure you are prepared to sand your hardwood floor. There are some considerations when you are going to sand your hardwood floor yourself.
- Time: You will need to be able to have the room empty for about 5 or 6 days. This means nobody enters the room, not to walk through it, or to set things down on the floor.
- Pets: You must be able to keep your pets out of the room for the whole duration of the sanding process. Some woods can be toxic if ingested, and pets walking through sawdust will lick it off of their fur. Check to see if this is true for your flooring.
- Stuff: All of the stuff in the room will need to be somewhere else while you are working in that room. This includes your fridge if you are working in your kitchen. You will need to provide places for the stuff in your room; that won’t make your home an obstacle course.
- Study: While this is obviously the most instructive thing you will ever read about flooring you need to make sure you find every resource. Learn how all the equipment works before using anything. Consult how-to guides for sanding, and any equipment. Anything that has the potential to damage your floor has to not be an on the job learning item.
Get The Equipment: So you have gotten all the preparation out of the way. You know when and how and why you are going to do the sanding yourself. Sanding your hardwood floor requires equipment that you don’t own. There are also some things you will need that you may have on hand. Take a look at the list and make sure you either arrange to rent, or buy everything you need.
- Floor Sander: Rent the best you can afford, this is the workhorse for the project. The speed and ability of the $5000 sander you can rent over the $400 sander you can buy is night and day. Don’t go cheap on this, rent the best you can find.
- Sanding belts: You will need 240 grit, 100 grit, 80 grit, and 60 grit belts or discs for your sander.
- Floor scraper: Get the one that feels best in your hand. Again the 5 dollar plastic handled model is going to save you time over the 1 dollar flat metal model.
- Masking Tape: Blue painting tape is the safest to use and won’t leave any residue.
- Protective Gear
- Dust Mask
- Goggles
- Hearing Protection
- Overalls/paper suit
- Protective gloves
- A good vacuum
- Rags
- Plastic tarps to seal off the room from the remainder of your home.
Get the Room Ready:
- Remove furniture, ensuring not to damage the floor. Avoid sliding heavy furniture across the hardwood. Use disc sliders on heavy objects if you can’t lift them.
- Seal exits to adjacent rooms. If there are no doors, seal off areas with plastic tarps. Ideally, you seal openings until the process is complete, leaving one access point. Use draft guards under doors to keep the dust from the rest of your home.
- Seal interior areas you want to keep dust free. Electrical outlets, switches, openings. Cover any HVAC inlets to keep your dust from being circulated through your home.
- Mark any area’s you don’t want to sand with painters tape.
Get Yourselves Ready:
- Have all of your protective gear, and wear it. Some of these steps are best accomplished without taking a long time for a break so block off enough time to complete them.
Sand the floor:
- Your choice of floor sander will determine how quickly, and how easily the process goes. A large drum sander is the fastest option but is also the most difficult to master. Your other choice is a random orbital sander. These are slightly slower but are also less complicated to use than a drum sander.
- Pick up a small handheld orbital sander for the hard to reach corners and tight edges where the large equipment can’t reach.
- Begin by cleaning the floor. This will remove grit and debris that can either damage the sanding pad or cause your floor to have deep scratches.
- Pick your sandpaper
- Sandpaper is graded by “grit.” The lower the number, the rougher the paper. You begin with coarser sandpaper that removes the finish fast. Then use progressively finer paper to leave yourself with a smooth finish.
- Always move the sander along the grain of the wood. To the non-woodworker, this means the lines in the wood itself. Don’t ever sand across the lines or against them. If you do this, you can end up with streaks or spirals in your finish.
- Using a belt sander can damage your floor if you are not careful. Any large sander should be kept moving while turned on. Leaving a large sander in one spot for any length of time will eat into your floor at an alarming rate. Move the sander at a steady pace to get an even sanding job out of your equipment.
- Begin in the farthest corner of your room and work your way back towards the exit. This keeps you from having to walk all over your freshly sanded floor.
- This includes using your handheld sander on the edges and corners before moving to the large areas.
- Move the sander in slightly overlapping lines to remove the finish. Consult the web for how your wood will look unfinished. Sand only enough to remove the finish to keep as much of the wood available for future refinishing projects.
- Engineered hardwood flooring can be even trickier. Take off only as much as absolutely necessary as the wood is only a layer on a base material.
- Once completely sanded remove all of the dust. Begin by sweeping and using a dust pan to get the larger amounts of sawdust off of the floor. Follow this up with a vacuum, be exceptionally careful not to leave tracks on the floor. The last step is to wipe up with tack cloth or microfiber pads that are damp. Avoid mopping the floor or allowing any water beyond a very small amount to come in contact with your floor.
DIY Guide on how to Refinishing
Refinishing your hardwood floor is something you will need to do from time to time. Scratches and regular wear will reduce your finish until it is no longer effective. Refinishing your hardwood floor is usually a job for a professional. It is possible to do it yourself though, and our guide will help you accomplish it.
How to stain hardwood floors
It is almost always best to remove all of the finish from your floor before adding new layers. This is most often done by sanding your hardwood floor. Details on how to sand your hardwood floor are given above. Once you have a bare hardwood floor, you can think about adding a new finish layer.
What you need:
- Paintbrushes that are good quality. Avoid buying the cheapest ones, or you will be picking bristles out of your stain all day.
- Sponges that are unused and not of the variety that have soap in the sponge when you buy it.
- Large bucket with a handle to easily transport it.
- Rags that won’t unravel or leave strings and fuzz behind.
- Vacuum that won’t leave trails from wheels.
- Mop that won’t leave strings, microfiber is best.
Staining your floor:
- Condition the wood by running a wet mop over the surface. This is called “water popping” and will raise the grain to help the wood take the stain.
- Use purified water, not tap water. Tap water contains chemicals that could affect the ability of the wood to keep the stain.
- Allow the floor two to four hours to dry before applying the stain.
- Examine the floor to ensure that the whole surface of the floor feels the same. Uneven patches on your floor will stain slightly darker or lighter than other portions.
- Apply the stain by dipping the sponge or rag into the stain. Wipe with the grain of the wood to get the best results. Don’t allow the stain to pool on the floor and do your best to put the same amount on the floor consistently.
- Wait approximately 10 minutes and then wipe away excess stain. The longer you leave the stain on the floor the darker the resulting finish.
Guide to Hardwood Floor Finishes
Wax: One of the oldest ways to seal a hardwood floor is to use wax. Prior to 1970 wax was the only available option. Wax is easy to apply, has a natural warm look to it, it penetrates into the wood offering a deeper protection, and have very little odor to it. The negatives are that it is not as durable as a polyurethane finish, it can stain easily, you have to do routine upkeep, and if you decide to switch to a polyurethane finish it must be completely removed.
Water Based Polyurethane: These are the most common form of floor finishes on today’s market and can be found on most new hardwood floors. You will need three or four coats to ensure your floor is protected. They are an improvement over oil based polyurethane coatings due to a much faster drying time, low odor and VOC’s, it won’t yellow like oil based polys, and they are easy to apply. It is more expensive than oil based polyurethane though and less tough as well.
Oil Based Polyurethane: Two to three coats of oil based polyurethane are enough to seal your floor. Oil-based polyurethane is cheaper, extremely tough and relatively easy to apply. It does take 8 hours to dry, though, has a strong smell, and tends to yellow with age.
Acid Cured Finish: One of the most expensive options acid cured flooring cures extremely hard. It’s one of the most durable options but can take up to 60 days to cure. You can’t do this on your own; it requires a professional to apply.
Penetrating Oil Sealer: Oil sealing is nearly as old as wax to seal your hardwood floor. Oil penetrates into the wood, enhancing the grain pattern of the wood and deepens the natural color. It is easy to apply on your own, it is normally non-toxic, and provides a mellow sheen. Oil is not as durable as polyurethane and will need reapplication every 2 or 3 years.
Make sure to read our article on applying Polyurethane to wooden floors. We’d also be happy helping you get quotes from refinishing companies.