
Have you wanted to try your hand at growing your own vegetable garden? Do turnips take up space in your grocery cart every time you go out and buy your groceries?
If you answered ‘yes’ to one or both of these questions, you should look into growing your own turnips.
Interested? Allow us to show you how to do it at home. But first, you need to learn some basics about it.
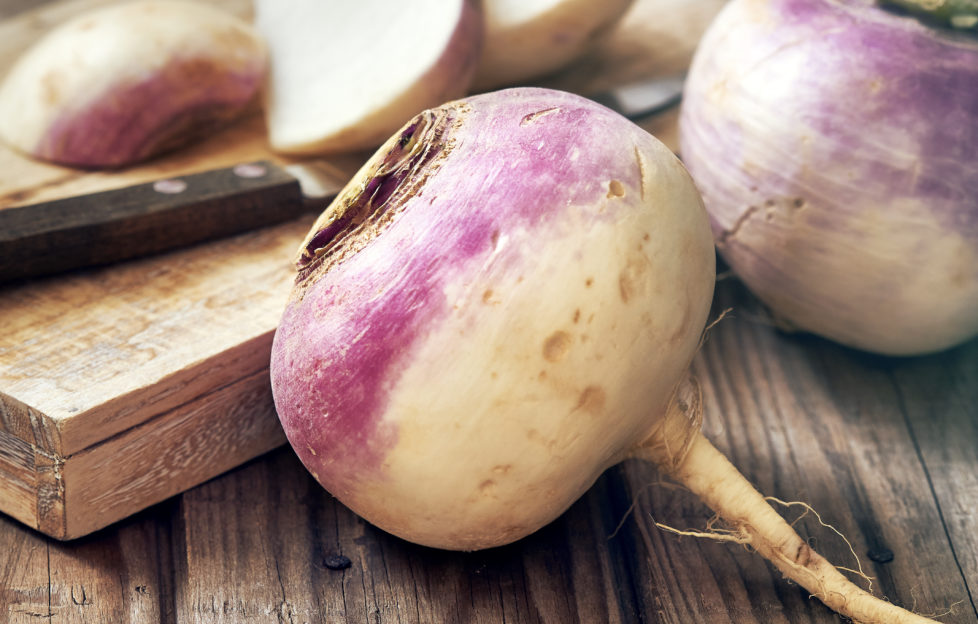
You probably know that turnips are bulbous vegetables, but did you know that there is evidence that they were consumed even during prehistoric times?
They are also biennials and their roots can survive winter, allowing you to harvest again come spring.
Not only can you eat their bulbs, but their leaves and even their roots are also edible as well.
Health Benefits
Being a vegetable, you already know that a single turnip is packed with vitamins and other nutrients. To be precise, eating them provides you with fiber, carbohydrates, manganese, potassium, magnesium, and protein, among others. Both the bulb and its leaves (or greens) provide you with vitamin C, and the greens also provide you with your much-needed vitamin K, calcium, and folate.
Aside from these, there are so many other health benefits when you consume turnips. Among these are:
- Help in digestion and even weight loss – because turnips are rich in dietary fiber, they can help resolve digestion issues, such as cramps, diarrhea, bloating, and constipation, and improve your digestion system, as well as help you lose weight
- Improves cardiovascular health – the presence of various antioxidants, potassium, vitamin K, and fiber boosts your cardiovascular system and helps prevent heart-related ailments like heart attacks and stroke, as well as atherosclerosis
- Helps fight cancer – different studies have shown that turnips can potentially prevent cancer, and even help fight it when it is consumed while a patient is undergoing treatment. This is particularly due to the presence of antioxidants, especially glucosinolates, and beta-carotene
- Improves the condition of your bones – turnips are rich in calcium, which is essential to bone health
- Can cure various inflammations and ailments – if you are suffering from inflammatory conditions, eating turnips can help you fight them. They can even help you pass small kidney stones
- Can be considered as food for your skin – the presence of vitamins A and C also benefits your skin and helps prevent the formation of fine lines, wrinkles, and spots
- Helps keep your hair healthy – turnips are also great for your hair because of the amount of copper it provides. Copper is necessary to form melanin and the antioxidants found in turnips improve the condition of your hair
- Can be used to combat body odor – you can directly apply turnips to your problem areas, such as your underarms, to help you get rid of body odor
- Helps improve your eyesight – turnips come with lutein, which is known to help improve your eye condition and prevent various ocular diseases
If we were to list down all the benefits of consuming turnips, it can take hours for you to read them. But the gist of it all is that turnips are good for you.
Types of Turnips
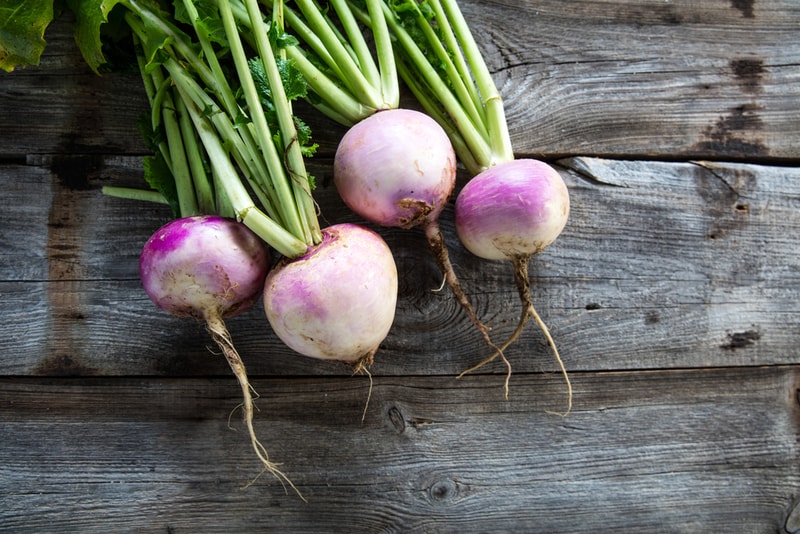
While grocery shopping or going around the market, you might have noticed that turnips seem to have different varieties. Some have purely white bulbs, some have purely pinkish bulbs, and there are some that combine both to have bulbs that are half white and half pink.
Because of it, you might wonder which type of turnip is suitable for you to plant. Different types of turnips are available and the ones you should plant will depend on which part you will use them for. Some varieties are grown for the entire turnip, while some just grown for their greens.
Here are some of the common varieties you can grow if you want to use the whole turnip:
- Golden Ball – has yellowish small bulbs and has a taste reminiscent of almonds (60 days)
- Purple Top White Globe – the most common variety that has a purple and white bulb (55 days)
- Tokyo Cross – has all-white bulbs and is an AAS winner (35 days)
- Scarlet Queen – a hybrid type that is red on the outside and white on the inside (45 days)
- White Lady – another hybrid type but is pure white and is known for its delicious roots (75 days)
But if you just want to harvest turnip greens, here are your best bets:
- Shogoin – known for its broad greens (42 days)
- Seven Top – has greens that are darker in color (40 days)
- Alltop – known as a fast grower and is fast to re-sprout leaves (35 days)
- Topper – is a hybrid type that is a heavy producer and also quick to reproduce (35 days)
How to Grow Turnips
Would you believe that turnips are actually quite easy to grow from seed and kitchen scraps, even for the inexperienced? You don’t need really anything fancy to grow them.
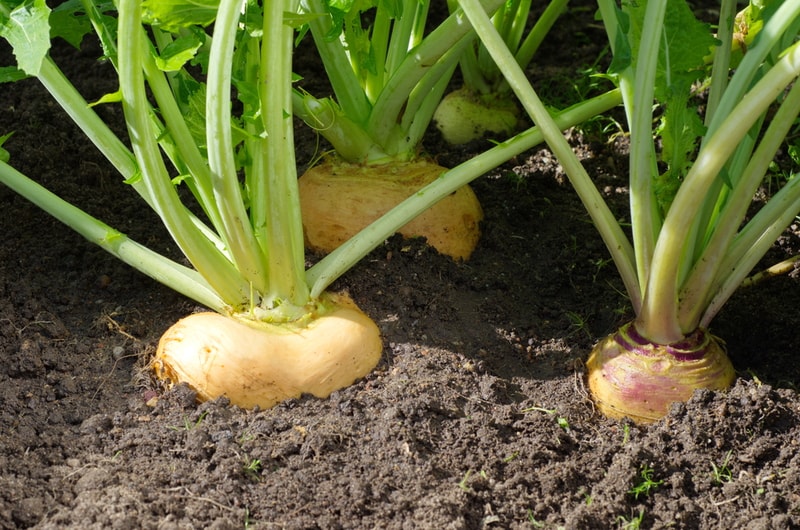
Since they are bulbous vegetables, you just need some space to plant them. If you have a garden or a small plot of land, that works best but if you don’t, you can still grow them indoors in containers and with enough light.
If you want to grow them outdoors, take note of the following:
- Choose a spot in your garden where you can permanently grow them, since they do not usually survive being transported.
- Remove weeds the area where you will plant them
- Rototill the plot of land so that the soil will be loose enough for turnips to grow. You can easily have this done by landscaping companies, and it won’t cost you much at all.
But if growing them indoors is your only bet, these are some things you need to take note of:
- Turnips need deep soil, so your containers must be deep enough for them to grow. Ideally, your container must be at least 10 inches high.
- Find a spot in your house where there is enough sunlight for them to grow. Turnips thrive best when exposed to much sunlight and although they can tolerate partial shade, this is not recommended if you grow them indoors.
- If you are growing turnips from kitchen scraps, use shallow containers because you don’t need to fully submerge the turnip top in water.
When to Plant Turnips
Despite their versatility and hardiness, there is still a right time for you to plant turnips. But what you should keep in mind is that turnips mature between 30 to 60 days, so use that as your guide on deciding when you should start planting.
Turnips love the cool weather. If you want a late spring harvest, you should sow them around 2 or 3 weeks after the last winter frost, or whenever the ground can already be worked on after winter. This can be in March, April, or May.
When harvesting in the fall, plant your seeds after your summer crops, around late summer. You can also sow some types of turnips in early fall and they will already be ready for harvest near the end of the season. Fall harvests are possible if you sow sometime in August, September, or October.
But if you want to plant turnip tops or kitchen scraps, it is ideal for you to do so sometime between August to September.
Where are Turnips Usually Grown?
To be specific, turnips are believed to have originated in Asia, specifically in the eastern region. They also usually grow in the wild in Australia, Western Europe, and North and South America.
Because they are such an easy vegetable to grow, turnips are found in various places. As long as they can have a temperate environment, they can thrive no matter where you plant them.
We already mentioned that turnips can grow indoors and outdoors, and where you plant them will depend on your convenience. But normally, people plant them outdoors because they thrive better there, especially when they are planted from seed. For turnip tops and kitchen scraps, these are usually found indoors.
How Deep Should You Plant Turnips?
Although turnips will burrow into the ground as they grow, this does not mean that you have to bury your seeds deep in the soil. Turnip seeds should only be placed half an inch below the top level of the soil at most. They will grow both above and below ground, so you should only plant seeds at the shallow part of the soil.
If you want to grow them using turnip tops or scraps, you need to use water only. Submerge the lower section, specifically with the water level just below the leaves of the turnip top. You should not fully submerge turnip tops, including their leaves.
Growing Turnips from Turnip Tops
Turnips are one of those vegetables where you really don’t throw any of their parts away. You can eat all of its parts and you can also regrow the scraps you have.
If you want to try your hand at growing turnips using the tops of the turnips, you need to know that turnips that are planted using this method will have bulbs that do not taste as good as the ones that are seed grown, even when you plant them later when they grow roots. This is because you really plant turnip tops or scraps for their leaves, not the bulbs.
If you want to regrow turnips from your scraps, here are the steps you need to follow:
- Only use the top part of the turnip. If it still has greens on it, just leave it alone.
- Find a container deep enough to hold water. Any container would work but if you want to plant them later in soil, it is best for you to use transparent or glass containers. This will allow you to see when roots start to appear on the turnip top.
- Pour enough water on your container to submerge a portion of your turnip top. Leave the greens above water level.
- Place your container with the turnip tops somewhere it can get sunlight. An ideal location is on your windowsill.
- There is no need for you to water your turnip tops every day. You just have to monitor the water level and add more when it gets low.
- Greens will usually start growing in 3 to 4 days. If you want to regrow the greens in your container, make sure you do not cut away the nodes or growing points when you start harvesting.
- If you want to transfer and plant them, you need to monitor the growth of the roots. Once they appear, wait at least one week before you plant them on the ground. You should not plant the turnip tops as soon as roots appear; let these roots develop first.
Growing Turnips from Seed
If you want to grow turnips not just for the greens, planting them from seeds is best for you. Seed-grown turnips promise you a delicious taste, from their roots to their greens and both cooked and uncooked.
Do you find the idea of growing plants from seed intimidating? If so, you have nothing to fear because turnip seeds are actually among the easiest to grow. Just make sure that you follow this guide:
- Add a layer of compost to the well-draining soil (like loam soil) where you want to plant your seeds. This layer should not exceed 4 inches.
- Moisten the soil before planting and check the soil’s acidity. Turnips grow best when the soil is acidic and with a pH level that ranges from 6 to 6.5.
- For easier planting, make shallow holes on the soil using your fingers. These holes will be where you will place each seed.
- Place your turnip seeds on the soil, making sure that they would not be placed more than half an inch deep into the soil. You should also have adequate spaces of around an inch or two in between seeds.
- If you want to have a more bountiful harvest, you can go for succession planting, not plant all of your seeds in one go.
- Sprinkle a bit of water over your newly planted seeds. Water them regularly to keep the soil moist but make sure not to overwater.
- As soon as they grow into seedlings, monitor their growth until they reach 4 inches high.
- Start thinning your plant by removing the outer growth. A space of 4 to 6 inches between them is ideal. If you are growing them just for the greens, you can just thin a minimal amount to have 2 or 3 inches of space between seedlings, or even not at all.
- For rows, there should be at least 12 inches of space in between them.
Since turnips are biennial, you can expect a single turnip seed to propagate for as long as 4 years, on average, with proper care. Also, remember to sow them in cool weather. Cloudy and cool days or at dusk are the best times for it.
Make sure to also read our guide here that includes a lot of plant growing tips.
How to Sow Turnip Seeds in Containers
If you just have minimal space to plant turnips and having them grow in equal spaces is not possible, why not just sow them on a soil bed?
However, what you should know is that this method is not really ideal for turnips if you will only use shallow containers. This is because you need soil that is at least 8 inches deep for turnips to grow. Those flat beds you normally see gardeners use to grow seeds won’t cut it.
You might remember that we mentioned in passing that turnips normally don’t do well when they are transported. Those grown from seeds that are later transported will easily die. This is something that you need to consider if you plan to sow them in containers for later transport.
If you are still interested in sowing turnip seeds, you need to make sure that the container where you will grow them is wide and deep enough for them to grow roots that can spread out.
Estimate how big turnips can grow on your container and consider your purpose of growing them. If it is just for the greens, you should only scatter a few seeds to allow the greens to thrive. But if you are growing them to use all parts, you can plant more because you will later thin them.
If you noticed, the sowing process in containers is just similar to planting them on a plot of land. You just need to take into consideration the limited space available for you to grow them.
How Long Does It Take for Them to Grow?
You probably had science experiments back then wherein you needed to grow a plant from seed. Do you remember the anticipation of waiting for the seed you planted to finally sprout and for leaves to appear?
If you are one of those who were impatiently waiting for your seeds to grow, you need not wait long if you are growing turnips. Germination is quite fast for them; you only need to wait for 5 to 10 days until you can see your seeds start to show signs of life and sprout tiny leaves.
On average, you can already harvest turnips that you grew from seed in 30 to 60 days, depending on the type. Like we discussed earlier, there are certain types that grow very quickly and there are also others that are slow growers.
Turnips will grow fast when you make sure that they get enough sun and the soil they are planted in is constantly moist.
When Should You Harvest Them?
One great thing about growing turnips at home is that you can easily harvest them. Not only are turnips low maintenance, they also grow quickly. This means they are ready for picking in just a few weeks!
But when is the right time for you to harvest them?
Earlier, we talked about measuring the seedlings as they grow because you may need to thin them. What you should now is that when they reach the height that you can already thin them, this is also the time when you can start harvesting the greens. You can already use the greens of the thinned seedlings for food.
The best time for you to harvest greens is when they reach 12 inches or more in height. Greens of turnips have the best taste when you harvest them while they are still young.
When you start harvesting, avoid causing damage to the top of the turnip’s bulbs and start by cutting the greens from the outside going in. If you damage the tops, you decrease the chance of the greens growing back for another harvest.
If you want to harvest the bulbs, you should do so when they are still small. A sure sign that you can already harvest them is when they have a diameter of 2 to 3 inches and are tender to touch. If you let them grow longer without harvesting, they will get pithy and will lose their tenderness.
But if you want your turnips to taste sweeter, you should have them experience a light frost, but not a hard freeze, before you harvest them.
When harvesting roots, make sure that they already have a diameter between 1 to 3 inches. You can remove them by hand at this range but if the roots are already larger than that, you should use a spading fork.
A great thing about harvesting turnips is that they can be kept for a long time. As long as you store them outdoors properly in a cool place and cover them up with straw, your harvested turnips can last as long as 4 months.
Caring for Them
Even if turnips are low maintenance and growing them doesn’t require much of you, that does not mean that you can just neglect them. If you want to harvest delicious turnips, you need to give them the proper care they need.
Everything starts with your soil. You cannot just use whatever soil you can find for your turnips, since soil quality will affect their taste. If your soil is of poor quality, don’t expect a delicious harvest. The soil’s pH level is important.
As your seedlings grow, you may add fertilizer to them periodically to nourish them. This lets them get the needed nutrients and can also help maintain the pH level of your soil. You can skip this if you were able to add fertilizer to your soil before planting your seeds, since fertilizing them before planting is much more important than adding fertilizer later on.
You should also add a thick layer of mulch or straw (around 2 inches is good) all over the base of your seedlings to prevent rapid soil evaporation and the growth of weeds.
Remember to thin your turnips if you are not just growing them for the greens. Thinning ensures that there are adequate spaces between your turnips to grow and for the roots to develop well.
Weeds are the enemy of turnips. It is vital that you keep the plot where they are planted weed-free, since these weeds will steal the nutrients, and even water, your turnips need. You should remove weeds by hand to prevent damaging them.
Space is important for turnips to grow well. If they are too close to each other, they can also compete for the nutrients from the soil and water. Not only that but this will also result in your turnips having shorter roots and smaller than ideal bulbs.
The ideal temperature for them to grow is from 60 to 70 ˚F, with 60 ˚F as the best temperature. Although they can withstand colder temperatures (but not lower than 45 ˚F), this would make them grow slower and you would have to wait longer for them to sprout.
It is quite easy for anyone to overwater plants, but not all of them will survive it. For turnips, overwatering can easily kill them, since they only need the soil to be constantly moist, not soaking wet. A good amount is an inch of water in a week.
Turnips are not immune to the diseases common to Brassicas (or the cabbage family), which they are classified under. They often fall victim to root knot, leaf spot, black leg, and turnip mosaic virus, among others. Mildew, both downy and powdery, can also appear on turnips. Once even one of your turnips begins to show signs of disease, you need to remove it immediately to prevent your other turnips from being affected.
Garden pests can also ruin your turnips if they are not removed at the soonest possible time. Those that you should watch out for are flea beetles and turnip aphids for the greens and wireworms and cabbage root maggots for the bulbs.
Done right, you can harvest turnips in your own homes that can taste better than the ones you get from the markets and grocery stores. It’s really not that hard, as long as you follow our guide and remember the basics.