
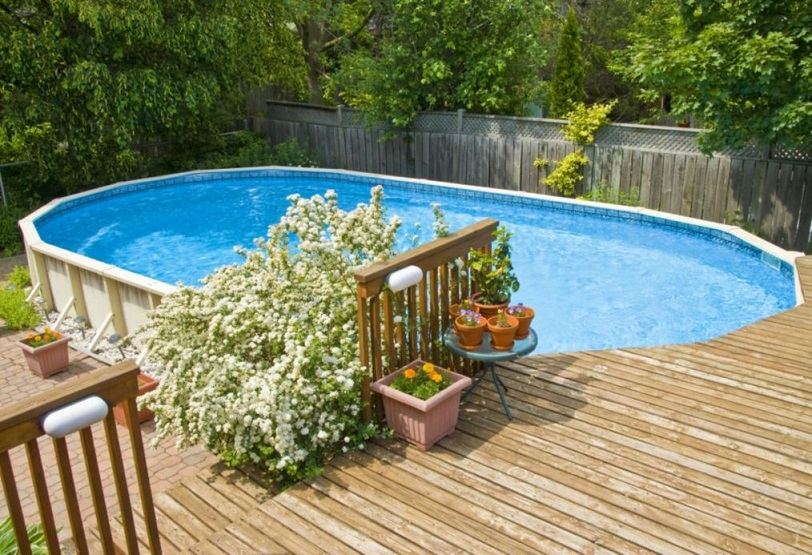
Back in the day, seeing an above ground pool, particularly the colorful Intex ones, in a yard meant one thing – there are kids living in that house. It was something parents can buy for their kids to ward off the hot summer days without breaking the bank.
Only rich families could afford to get a swimming pool installed in their homes, and portable above ground pools were the easiest way to have one. It’s even considered as the next best thing – set it up, fill it up with water, and you’re done!
As demand grew, manufacturers developed portable above ground pools that can be used by both children and adults alike. But, all that prep work to set up the pool and fill it up with water every time was tiresome for many.
On this page:
- Mistakes to Avoid When Installing a Pool – The Importance of Correct Leveling
- Setting Up an Above Ground Pool on Unlevel Ground
- Above Ground Pool Leveling Problems
- What Materials Can You Put Under an Above Ground Pool to Level the Ground?
- Tools Needed for Leveling the Ground
- Above Ground Pool Leveling Kit
- Pavers Under Above Ground Pool
- How to Level an Above Ground Pool on Grass
- How to Level an Above Ground Pool with Water in It
- How to Level the Ground for a Pool Without Digging
- Getting Quotes from Pros
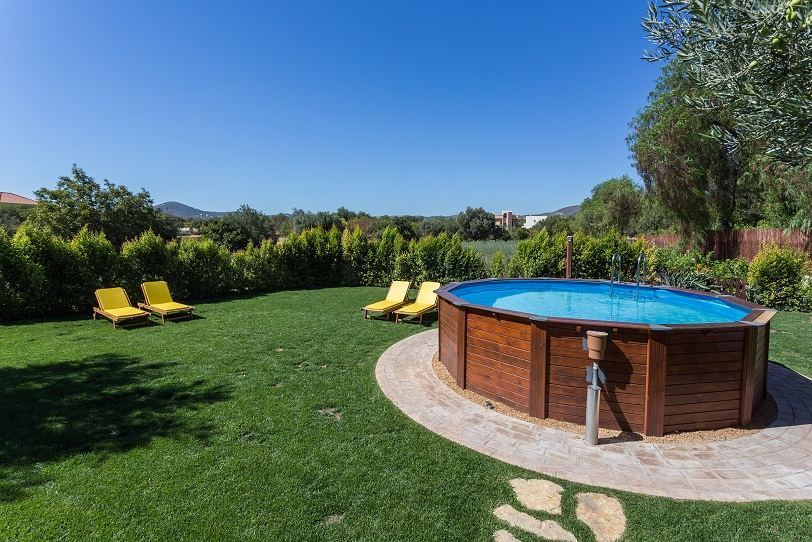
To keep up with the clamor for better above ground pools, manufacturers came up with designs and ways over the years to make them more convenient to use and maintain.
These developments paid off, since people now have different pool options to choose from. In fact, there’s a general consensus that the easiest way to have a pool in a yard is by choosing above ground pools.
What’s going to be difficult about it is leveling the ground where it will be installed.
Don’t worry, we can help you out with that. We’ll be discussing its ins-and-outs, as well as the importance of doing so.
Mistakes to Avoid When Installing a Pool – The Importance of Correct Leveling
Many have this mindset that you can have an above ground pool placed anywhere. While this is true for portable kiddie pools, since kids wouldn’t really mind anything else once they’re in the water, the same can’t really be said about above ground pools.
It’s not just uneven water levels you’re going to deal with; you’ll also face structural issues, particularly if the slope where it is placed is too bad.
At first, water will just overflow on one end. Later on, you’ll see that particular side start to lean and spill even more water. And then it will become permanently deformed on that side because it is holding up more weight. This will cause you to replace your pool soon, unless of course you’re fine with a lopsided-looking one.
Aesthetics is not the only reason why an even ground is essential to above ground pools. A lopsided pool is at risk of collapsing in the future on the bent side, because it is unstable with all that weight it is holding up. And if it happens while in use, there is also the risk of injury and flood.
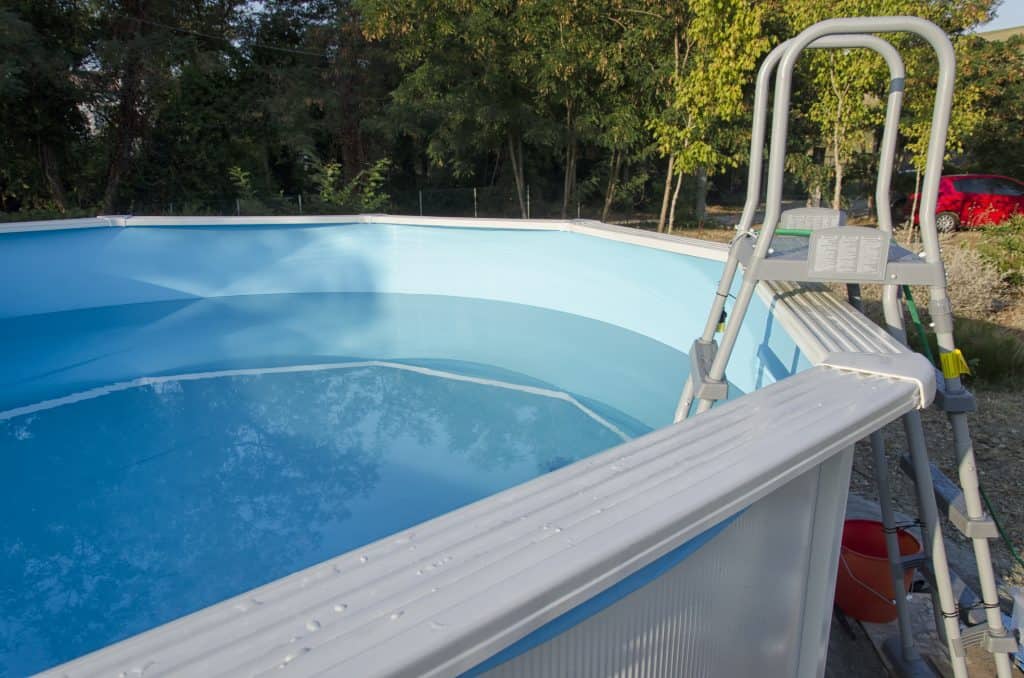
Admittedly, it’s nearly impossible to get a completely level ground for your pool. That’s why contractors aim to get the ‘off level’ by not more than an inch at most. If the level of the ground is off by 3 inches or more, it becomes problematic.
It’s not just a level ground that you should concern yourself with; it is also vital that the ground where your pool will be installed is even. Any bumps, lumps, or rough sections on the ground will be easily felt and can be uncomfortable, especially if you have vinyl pool floorings.
This is why it is important to make sure that the ground is as level and even as possible, particularly on the areas where the uprights and rails are placed, before installing an above ground pool.
Setting Up an Above Ground Pool on Unlevel Ground
Above ground pools are cheaper and much easier to install than in-ground pools – that’s a given. There is no need to do the painstaking and time-consuming task of digging a hole on the ground on your yard, shaping this hole, creating the foundation and framing, installing your pool’s fixtures, drains, and other plumbing necessities, and then filling it up with water.
You skip many of those steps, since its installation only involves getting the ground smooth and level, with the option of adding a base material first, and then setting up the pool itself.
Although it’s already easier to install an above ground pool compared to an in-ground pool, plenty of people skip the part of leveling the ground for their pool. What they don’t know is that it’s as vital as excavating a hole for an in-ground pool.
Aside from the ones we briefly mentioned before, an uneven ground can cause other issues, namely:
The Level of Water in Your Pool Will be Uneven
A few inches of unevenness may not matter to you at first, but the deeper side of your pool will become even much deeper as time passes. If you have an above ground pool that is already quite deep that both adults and children use, it can be dangerous for everyone. Children have a higher risk of drowning, but it can also happen to adults.
Some also choose to have pool skimmers installed to keep the pool clean, but it won’t work properly if the water is uneven and is installed in a location where it is not covered up at least halfway by water.
It Will Affect Your Pool’s Walls
It’s a given that an uneven ground will let water be concentrated on the pool’s lower areas. Because of this, the pool walls that bear the most weight will ultimately bend, get twisted, and collapse. Not only can this cause damage to your pool and property, injury can also happen.
If you think that this only happens to inflatable pools, you’re sadly mistaken. This also applies to pools that have solid walls.
Your Pool’s Liners Can Get Damaged
Pool liners, if properly laid out, will follow the surface of the ground where it is placed. That’s why it will be easy to discover any rough areas, bumps, and unevenness on the ground. If your pool liner is on an uneven surface, it will have some noticeable folds or wrinkles that can get caught or snag on your pool equipment. This can then cause tears on the liner itself, resulting in leaks and leak detection is no joke and can be very hard.
Proper location of your above ground pool is as equally important as installing it on an even and smooth surface. You need to make sure that there is ample space for the pool and its surroundings; having your pool at least three feet away from any structures is ideal. It’s also a good idea to keep it away from trees, as it will mean frequent cleanups for you because of the falling leaves and branches, and its roots may affect the ground later on.
To lessen the amount of prep work for the pool, choose the area in your yard that is as flat as possible and without any structures in its immediate vicinity.
Above Ground Pool Leveling Problems
Setting up and constructing any kind of pool is no easy task – with the exception of those kiddie Intex pools, of course. That’s why it’s surprising that some homeowners are willing to build their own pools by themselves.
It’s even more surprising to hear them complete the project successfully like it was built by a contractor, because frankly, most DIY pool projects fail – even more so for above ground pools. Some of the common issues with DIY installations are:
- Wrinkled pool liners
- Verticals that are bent or out of shape
- Leaks
- Loose fittings and connections
- Uneven ground
Many underestimate the amount of work involved in building an above ground pool via the DIY method, thinking that no prep work is needed and they only have to set it up and keep it upright when it gets filled up with water. They later realize that it’s easier said than done.
Having an uneven ground for an above ground pool is the most clear-cut sign of an improper installation. About an inch or less of unevenness is considered acceptable, but more than that is problematic. Pools that are badly off level will not last long; instead of lasting years, you may have to dismantle and get your above ground pool redone in just a matter of months.
Getting a level ground needs to be done first before setting up the pool itself. It doesn’t matter if you’re going for a rectangular pool, a circular pool, or even a uniquely-shaped above ground pool – all of them should have an even ground first before being set up.
Leveling the ground when the pool is already set up is still possible, but is challenging and time-consuming. If you want to know how this is done, keep reading because we will discuss it in detail later.
What Materials Can You Put Under an Above Ground Pool to Level the Ground?
Swimming pools are primarily used for relaxation and recreation. But, how can you relax if every time you take a step, you can feel rocks on the ground and other rough and sharp sections, despite having a pool liner in place?
Most people have vinyl pool flooring for their above ground pool, and one of its major cons is that any unevenness on the ground will be immediately obvious. That’s why many pool installers choose to add a layer placed between the ground itself and the flooring of the pool to get a level ground.
This added layer actually serves a few purposes:
- Aids in making the ground as level as possible. It also makes the flooring of your pool comfortable, especially when vinyl flooring is used
- Serves as protection for your pool, because this will prevent it from getting punctures and abrasions
- Will help keep your pool stable over time and maintain its evenness
You can choose among the following base materials for this layer:
Sand
This is the more traditional way of ensuring that the ground where your pool will be installed is going to be level and stay that way for a long time. Leveling sand is easier than leveling the ground itself, not to mention cheap, that’s why most people choose to use it for this purpose.
However, it also has its drawbacks. For starters, its loose particles allow critters to burrow underneath your pool and make it their nesting ground, which can damage your pool’s base material. And because it is loose, sand can get washed away or dislodge from where it is placed, making it unreliable for leveling purposes.
While sand is a good choice for your pool’s base material, do note that this is not advisable for use over concrete, because it can make your pool unstable. Sand will easily move around on a concrete surface.
Concrete Slab or Pad
The easiest way to have a level ground for your pool is to use concrete. It’s easy to get a level and smooth surface with it, and its rough texture will make sure that your pool will remain stationary, even when it is being used by a lot of people.
However, its rough surface is also its major disadvantage. Later on, your pool may get damaged because of abrasions after being constantly subjected to the rough surface.
This is why another layer between the concrete and the pool itself is needed. Sand may be cheap but it is not recommended for use with concrete, so you’ll have to use the more expensive commercial pads.
Solid Foam
Aside from being a protective layer between a concrete surface and your pool, foam can also be placed directly over grass to get a level ground. Usually made out of either polystyrene or polyurethane, it has varying thickness and can be cut to whatever shape is needed.
The only downside to using this is its cost – it is not cheap.
Crushed Stone
A better alternative to sand, crushed stone is also used to help make the ground level for your pool. It’s also a much easier material to use for leveling than sand, and prevents critters from burrowing underneath.
Stones for this purpose, often limestone, should be crushed well. If not, expect to have tears on your pool in the future.
In the end, it’s a matter of preference if you want to install your above ground pool directly on the ground or over any of these materials. What’s of utmost importance is to get it installed on a level surface, while ensuring its stability when in use.
On Sand
Most would still prefer using sand, particularly mason or mortar sand, as the base material for their above ground pool. This is especially true for those who want an above ground pool on a budget. An Intex pool plus some sand underneath will already make for a good above ground pool in your yard without spending too much.
If you plan on using sand as your base material, you should know that it will eventually settle on the ground, and this may affect the level of your pool later on. It’s good as a protective layer, but not so much for leveling purposes.
When it settles, the sand has the tendency to expose the ground, including the rocks, if the amount is not enough. If this happens, it can damage the pool’s liner; no amount of leveling sand will prevent this if the sand is not enough. That’s why a thick layer, about 2 inches or so, is ideal to stop this from happening.
But if you live in a rental home and want to have an above ground pool without risking the wrath of your landlord for ruining the landscaping, you should know that this can’t be achieved even if you place sand under the pool. It will still likely leave an obvious spot on the ground even if the pool has been removed.
Tools Needed for Leveling the Ground
If you’re thinking of building your above ground pool yourself and plan to get a level ground by just pushing around a flat and lengthy piece of wood on its surface, stop! You’re doomed to fail that way!
At the same time, don’t think that sophisticated tools are needed to get a level ground for your pool. Professionals can do it with a variety of materials, but what’s important is that they have items that will:
- Skim the surface of the ground
- Determine if it is properly level
- Mark the perimeter of your pool
- Remove the excess soil or earth
As long as tools that can serve those purposes are present, properly leveling the ground is possible.
Above Ground Pool Leveling Kit
Different installers have different tools they favor for this task. More often than not, they will have the following in their arsenal:
- Shovel and wheelbarrow for picking up earth and other debris (yes, there may be still some digging involved)
- Metal rod or stake that will serve as the marker to indicate the center of the pool
- Carpenter’s level (around 4 feet is ideal)
- Duct tape
- Tape measure
- String or rope
- Spray paint or any other item that can mark the entire perimeter of your pool
- Crushed stones, such as limestone, that can be used as the pool’s sub-base if needed
- Hand tamper and garden hose to level and make the earth compact
It’s a matter of preference for installers when it comes to their chosen tools for the task. What matter is, leveling should never be skipped because the longevity of your above ground pool will highly depend on it.
The Process
Various professionals, and even DIY gurus on the internet, have different methods to prep the ground for an above ground pool. Traditionally, this is concentrated on the area for the bottom rails, which the walls of the pool will be installed to. This is what is vital, after all.
The typical DIY method of leveling, meanwhile, focuses on getting a level ground for the entire perimeter. This often involves using a lengthy skimming tool, usually pieces of wood nailed together. A leveling tool will then be attached to it, and one end of the connected wood will be nailed to the center of the pool area, allowing it to do a 360-degree pivot to level the ground.
The DIY method may seem easy and ideal, but this is unreliable and takes a lot of time to do. Since the bottom rails of the pool are installed on the outer areas, it would also be challenging to make sure that this section is level; the properly leveled sections are mostly found near the pivot point and hardly in the areas that must be leveled.
Not only that, it doesn’t really make the ground smooth, which is equally important. Many who go the DIY route focus on leveling and neglect smoothening the ground; they only do that when the pool walls, cove, and bottom have been put up. This means extra work that could have been avoided in the first place.
And if you plan to have a rectangular pool, the DIY method will be ineffective, since the pivot will form a circle. The rest of the ground must be leveled by hand to form the rectangle.
It’s absolutely fine, although can be uncomfortable, if the ground where the inside of your pool is not completely level; what’s important is to have a level ground for its bottom rails.
Specific Steps Involved
To give you a clearer picture, here’s how the steps go:
- Find an ideal spot where the pool will be set up. It’s best to choose a flat section, but make sure to inquire about any local codes in your area that may conflict with its installation
- Make sure that there are no utility lines running below the surface of where the pool will be placed. Also, it is vital that the spot has room for proper drainage – you don’t want to have a swamp out on your yard, instead of a pool
- Once a spot has been chosen, use a leveling tool to determine higher spots and slopes. This can also be done by sight alone
- Place markers, such as stakes, to identify these spots
- Get them to the same level with most of the ground by digging up each high slope, rather than adding earth and other materials to the lower areas. For severely sloped grounds, this might require the use of heavy equipment
- Use a leveling tool to see if the elevated spots are already of the same level as that of the lower ones.
- Rid the ground of debris, including rocks and branches, using a rake
- Use a garden hose to get the earth wet to make it easier to compact
- Make the soil completely compact and firm using a hand tamper or lawn mower
- If using sand or any other base material, place it over the tampered ground. Make sure to check with the manufacturer about the amount of sand or crushed stones that can be placed under the pool. Crushed stones are ideal if it will also be used for leveling purposes
- To avoid fungal and plant growth, it is recommended that fungicide and herbicide be applied to the ground first. Let it sit undisturbed for around 2 weeks untouched after application before installing the pool.
If the chosen area has sod, this needs to be cleared up first before leveling the ground. Here’s how to do that:
- Kill the grass in the area where you plan to place your pool by covering it up with plastic sheets or tarpaulin. This must be done at least 2 weeks before you get your pool installed
- If the grass is not completely dead, get the sod removed. Do this only after it has been wet after a rainfall or after watering. The next day following a heavy rainfall is ideal, but the ground can also be deliberately soaked with water and the sod removed a few days after it
- Get the sod removed by either using a grub hoe or sod cutter for larger areas.
It is important to remove the grass where an above ground pool will be installed to be. If not, it can continue growing and may affect the stability of your pool and make the ground uneven, especially where the rails are installed.
Pavers Under Above Ground Pool
Nowadays, pool installers and DIYers also add leveling blocks under the bottom rails’ connectors. They do this even if they managed to successfully get a smooth and level ground for the pool. Some pros, however, choose to skip placing them.
But for those that place these blocks, they do it in one of two ways:
- Lay down the bottom rails of the pool on the ground to see where the connectors will end up, mark those spots, remove the rails, and place the blocks on the spots before properly installing the rails
- Do the same process but without removing the rails once they have been placed on the ground. The installer will just have to insert the leveling blocks below the connectors. However, this method can be difficult for most.
Patio blocks, or pavers, are usually used as leveling blocks. These are ideal because of their durability, but others also use makeshift blocks, such as concrete blocks and wood that has been pressure treated. These blocks help keep the uprights stable, so make sure that the leveling block to be used for your pool can provide ample support; concrete and wood can be unreliable for this, so it’s not really recommended.
The challenge with using leveling blocks is to make sure that all of them are of the same level. Hand levels may be used but this is prone to errors, as different reference points (in this case, leveling blocks) will be used every time. Using a builder’s level is recommended, because the same reference point is used for every block placed. This keeps all blocks at the same level.
How to Level an Above Ground Pool on Grass
Some above ground pools are designed to be directly installed over a grassy ground. Even if this is doable, it is still not recommended.
For starters, the grass will continue to grow and it can damage the lining of the pool. Because there is no protective layer underneath, any sharp rocks and uneven sections will also be felt. And because grass is trapped and you can’t easily remove it when it dies, there will be a rotting smell coming from it.
You should also be prepared to see bugs and other animals burrowing on the ground under your pool after you remove it. Yikes.
This is why it is recommended to get the grass removed first before you install your pool over your chosen spot. But if this is not doable, you should place a base material over the grassy ground.
How to Level an Above Ground Pool with Water in It
It would be very difficult, even for seasoned pool installers, to remedy a badly uneven ground over a pool that has been already set up. More often than not, this will involve dismantling it before the ground can be leveled up and made as smooth as possible.
When this happens, the pool liners will likely need replacing. You may attempt to reuse it, but this may later require you to get your pool redone again. This is why it is often a sound choice to just get a new liner.
But if the ground’s level is only off by less than three inches, you can get this issue fixed without having to completely dismantle your pool. However, not all professionals are knowledgeable about doing so.
This is usually done via the following steps:
- Draining the pool until it is nearly empty. Leveling the ground while the pool is filled with water should never be attempted. Not only will it be difficult, it can also cause injury
- Identifying which section of the pool is lower
- Finding the location of the leveling blocks of that lower section and pulling them off first
- Locating the bottom connectors of the pool and prying the walls to get it to the proper level
- Reinstalling the leveling blocks
- Repeating the process for all the lower sections of the pool
- Packing up dirt underneath those walls that were raised up
- Refilling the pool with water once all the lower sections have matched the level of the higher sections
It is easier to work with the lower sides of the pool; it requires less work to increase its height than to lower the higher parts of an above ground pool.
But then again, everything would be a lot easier if the ground has been already smooth and level before installing the pool over it.
How to Level the Ground for a Pool Without Digging
By now, you know that leveling the ground for your above ground pool will involve some digging, though not as much as that for an in-ground pool. But if you want to skip any kind of digging, that’s not really possible even for an above ground pool; the only way this would happen is if you have a completely even spot on your yard, which is nearly impossible.
But if the slope of the ground is off by only a fraction of an inch or so, the base material can be just modified to get a level ground for the pool. Leveling sand or crushed stones to get a level ground can work in this situation. Using foam would be easier since it can be easily cut. The same is true if you use concrete. But, minimal digging may still be done for it.
But if the ground’s level is quite uneven, there’s no other option but to dig out the higher areas to make it level with the lower sections.
Getting Quotes from Pros
Installing pools, both in-ground and above ground, involves a lot of work. Above ground pools will also require accuracy during the prep work, particularly for leveling the ground. Because of all that needs to be done, a lot of homeowners choose to get a pro to do all the necessary work for their above ground pool. It’s the easiest way, after all.
Since this is considered as an easy job by many professionals, you can expect a lot of contractors to express their interest to do it for you. It can be tedious to narrow them down, get in touch, and ask each one of them with their quotes.
Some may not be even be generous with that – they’ll give you their quotes but only if you pay for it.
To avoid all these, why not try out our service? You’ll only need to do these three things:
- Fill out our form
- Wait for the response of competing contractors
- Choose among their offers
It’s really that simple!
Best of all, you can get up to 4 quotes from contractors… for free! And because these contractors are aware that they are not the only ones sending in their offers, you can be sure that what you’ll get is the best one they have.
Of course, there may still be room for negotiation with them.
But if none of their offers catches your fancy, feel free to say no – it’s totally fine and there’s no penalty for it. We won’t hold it against you, and there are definitely no strings attached to it.
It’s always a great idea to get as much quotes from contractors for any kind of job for your home, including setting up an above ground pool.
So, why not try our service out and get your pool already set up as soon as possible?
That way, you can already look forward to the weekends with you just relaxing in your pool, with your drink of choice in hand.
It sounds amazing, doesn’t it?