
When the weather is being unfriendly, what’s your first line of defense against external elements?
When the heavy rains are not letting up, what helps you sleep better at night?
When the sun is in an unforgiving mood, what’s that one thing that protects you from its harsh rays?
The answer, of course, is your roof.
The roof is perhaps one of the most underappreciated parts of a home. But when it starts showing signs of a leak? That’s when most homeowners start to give it the time of day. And it’s just as well. Considering how a roof leak can easily develop into more serious issues, it’s not hard to see why many seasoned homeowners are giving it priority over other parts of the home.
One of the most challenging aspects in dealing with roof leaks is that they often happen during a heavy downpour. In such situations, not many roofing contractors are readily available to carry out roofing repairs.
That doesn’t mean you should do nothing and allow the water to infiltrate your home. That’s a disaster waiting to happen.
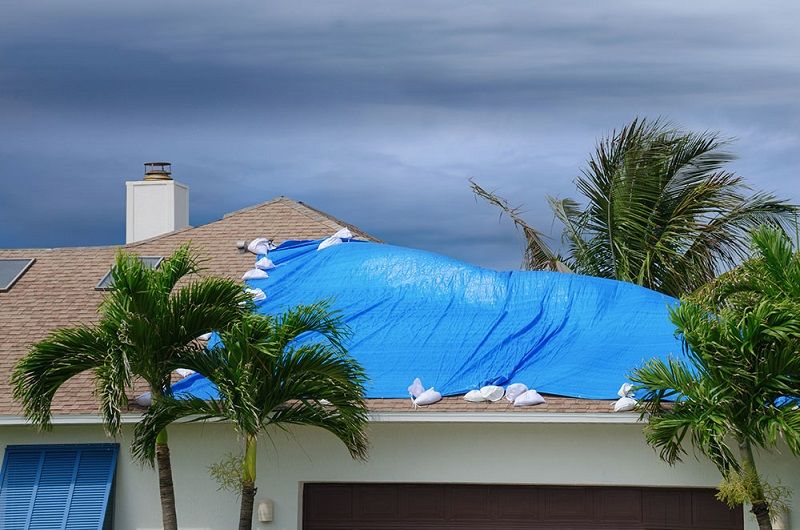
So, what’s the best course of action to take in such a situation? Five words: Put a tarp on it!
Believe it or not, a suitable tarp can protect your home from the dangers of roof leaks for up to 90 days, which should be more than enough time for a roofing contractor to come in and carry out permanent roof repairs.
This article is the first part of a series about how to put a temporary tarp on a leaking roof. The second part, which demonstrates how to tarp a roof up without the use of nails, can be found here).
Dangers of a roof leak
But before we delve into how you can effectively tarp a leaking roof, let’s talk about the most common dangers posed by a roof leak. After all, discussing these dangers serves to highlight the best reasons why you need to have a tarp lying around.
Structural damage
A roof leak can compromise the structural integrity of your home over time. Water, if left unchecked, has a way of traveling in places where they’re not wanted. They can penetrate through the wooden parts of your roof and attic. They can soak through your home’s ceiling joists and walls. If you don’t do something about it, your home’s overall structure eventually suffers, causing your house to sag or fall under its own weight.
Mold and mildew buildup
Roof leaks can make your home a breeding ground for mold and mildew. These critters thrive in wet and humid environments, and once they’ve taken root, getting rid of them becomes a challenge. Mold and mildew are not only unsightly, but they’re also bad for your health. According to CDC, exposure to mold and mildew causes upper respiratory tract issues, among many other health problems.
Safety Hazards
Wherever there’s water, there’s always the potential for danger. The most notable danger of a leaking roof is that the water may come in contact with the electrical wires in the electrical circuits in your home. When some of the wirings are not sufficiently insulated, there’s always the chance of sparks, which can cause serious injury or worse.
Water also has a way of puddling on flat surfaces, especially the floor. These puddles are accidents waiting to happen, especially if you have elderly people and children in your home.
Steps to install a temporary tarp to repair your roof
Now let’s get to the good stuff. Here are the steps to installing a temporary tarp to patch up your roof.
First things first: It’s still recommended that you hire the services of a professional roof leak repair contractor. But if your roof needs emergency repairs, using a temporary tarp is your best bet.
- Assess the extent of the damage. Don’t forget to use a ladder to climb up on the roof. After clearing away the dirt and debris scattered on the roof, go to the affected area and measure the size of the damage. You can use a tape measure to get the exact dimensions.
- Buy a tarp. Visit a hardware store (such as your nearby Walmart or Lowe’s) to buy a suitable tarp. As a general rule of thumb, you must buy one that’s bigger than what you actually need. Make sure that the tarp is thick enough to handle heavy rainfall. The thicker the tarp is, the better. A tarp should extend past the edge of the damaged area by at least three feet on all sides. A tarp with UV protection is also ideal to ensure that it can withstand long exposure from the sun’s rays.
- Buy all proper safety equipment. The rooftop is obviously one of the home’s most dangerous places, even more so if you’re working in the rain. You can never be too careful up there, so make sure you have the following safety equipment on you before you make an attempt to tarp up your roof: thick gloves, a strong ladder, a helmet, protective glasses, non-slip boots, a high visibility vest.
- Position the tarp. Grab one corner of the tarp and have a helper grab the other end. Pull away from each other until the tarp is fully unrolled. Lay the tarp flatly over the damaged area and make sure there are at least 4 feet of it overhanging past the roof’s peak and the rest over the eave.
- Secure the tarp. Using cap nails, attach one of the tarp’s peak ends to a 2 x 4. Wrap it around the piece of wood and adhere the board to the roof with screws. Do the same to the other ends of the tarp to keep it secure and watertight.
Safety measures you need to take when repairing a roof
Let’s state the obvious: roofing jobs are dangerous. If you don’t observe proper safety procedures, then you might just end up hurting yourself or worse. Before you embark on a roofing project, make sure that you make all the necessary preparations to ensure that the project can be completed without any accidents.
- Wear non-slip shoes (here’s a bunch of them that have been reviewed). The top of the roof is the worst place for anyone to lose their footing. So, make sure that you put on a pair of non-slip shoes before you go up there. A pair of rubber-soled work shoes or a pair of boots with good tread or traction will serve you well.
-
- The ladder should be on a level surface. Is the ground below you uneven? Then you need to make it even by laying down a piece of plywood over it. If the ground is made of slippery glass or dirt, dig small holes where the ladder’s feet can fit so that they won’t slide.
- Use a safety harness. Attach a safety harness to an anchor on the ridge of the roof to avoid injuries from nasty falls.
- Don’t work on the roof alone. It’s always better to have someone on hand in case you catch yourself in a dangerous position on the roof.
- Clear away debris and any material on the roof that may pose a slipping hazard.
- Don’t tempt fate. If the rain or winds are too strong you may want to reschedule the roofing job at a later time or date. Remember, a slippery roof coupled with a strong gust of wind can easily sweep you off your feet.
- Prepare your tools and materials in advance. You don’t want to go up there only to realize that you forgot to bring with you a tool or material that is critical to the roofing project. Make a list of all the required supplies so that you can inventory them later. Once you’re sure that you didn’t miss anything, use a rope pulley or a roof harness system to bring all your tools and materials up on the roof with little effort.
- Take frequent breaks. Roofing jobs are backbreaking and tiring work, and being physically fatigued up there is a recipe for disaster. So take regular breaks. Not only will it allow you to perform better work, but it will also keep you safer.
- Know when it’s necessary to call a professional. If there are tasks in the project that is beyond your skill level, the best course of action is to hire the help of a professional. Don’t overestimate your DIY skills.
Other Temporary Repair Options
While tarping is one of the most efficient and effective ways to patch up a leaking roof, at least temporarily, it’s not the only solution. In fact, there may be instances where a different solution is the best one.
Here are other temporary repair options that can help you stymie the negative effects of a leaking roof.
Apply roofing tar
Roofing tar is recommended by most contractors as a temporary roof repair solutions because of its durability and versatility. Made from coal tar and petroleum byproducts, roofing tar is durable enough to protect your roof from strong winds and heavy rain for days. The only drawback with roofing tar is that it works best under certain conditions (low temperatures, dry weather, etc.).
Before applying roofing tar on the roof, you must establish a designated starting point as well as an endpoint. Keep your bucket near at hand as you spread the tar on the surface with a roller. Don’t use copious amounts. Just glide the roller along in short, smooth strokes. Continue doing this until the entire area is covered. Then allow the roofing tar to dry up for the prescribed time as it appears on the package.
Apply roofing cement
Roofing cement is an excellent patching material for roof leaks, although that is not the only thing that it can do. It’s also used for stopping leaks in the roof flashing around chimneys or on a roof valley, as well as repair leaky gutters and fix cracks in concrete or cement.
For effective and easy application, apply roofing cement using a trowel or a putty knife. Make sure that you clear away dust, debris, and dirt from the affected area before application. It’s advised that you use roofing cement in dry weather. If you have no choice but to work in wet weather, use a wet-surface formula to ensure that the cement’s quality stays the same.
Re-adhere the damaged shingles
If some of your roof’s shingles have gone missing or have curled up or come loose, you can temporarily fix the issue by re-attaching or re-adhering them again.
For curled up shingles, simply apply a heat gun on them until they’re malleable enough for you to get them back into their proper shape. Next, re-attach them using roofing cement.
For loose shingles, just slide them back into their original positions before nailing them down with 6D galvanized nails. For added reinforcement, glue down the nail heads with roofing cement or any other adhesive that’s equally as strong.
How much does it cost to tarp a roof?
One of the many questions you may be asking right now as you continue to read this article is this, “How much does it cost to tarp a roof?”
Getting a breakdown of the overall costs for tarping can be tricky. The cost of the tarp itself deserves the utmost consideration. If you go to a nearby Walmart, a 20×20 roofing tarp (they mostly come in blue) will cost you between $20 and $80. And make sure that you don’t buy one meant to be used for RV’s! We’re talking the heavy-duty kind here. If you want your tarp to hold, buy the ones that are waterproof, reinforced, and at least 16 mils thick. This is your roof we’re talking about, and you can’t take any chances by using run-of-the-mill fare that won’t even last you a day.
On average, hiring a roofing contractor to perform an emergency tarp installation will cost you between $200 and $500. On top of having to pay for the tarp itself, you also have to factor in the cost of labor, “emergency” premium charges, and the strips of wood that will secure the tarp to the roof.
Other factors that may influence the pricing include:
- The size and quality of the tarp to be used.
- The roof pitch
- The extent of the roof’s damage
- Number of slopes to be tarped
- Amount of “2×4”’s or 1″x’s needed
While it may sound like a lot, you can always request quotes for the project just to hear them out what they’l charge since regional differences will play a huge role.
Getting quotes for a roof repair the easy way
You’ve finally decided on hiring a roofing contractor to carry out roof repairs for you. Great! But there’s one big problem: You don’t know who to hire.
Can’t say I blame you. After all, you don’t want to end up paying someone who won’t be able to give you your money’s worth. You want a licensed contractor who will charge you a fair price, who will take care of your roof, and who will look out for your interests as a homeowner.
If you want to find the best roofing contractor for the job, you need to gather as many quotes as possible. For one, having multiple quotes to choose from gives you more opportunities to land a transaction that meets your unique needs.
Getting quotes can be labor and time intensive. Fortunately, you don’t need to do all that legwork to get your fair share of it. All you need to do is sign up the form below and you’ll get quotes for a roof repair in no time. No tricks, no BS. Just free quotes from high-quality roofing contractors at your fingertips at no cost to you!
