
Here’s the thing with a leaking roof. There are several possible reasons behind it. It could be because of damaged shingles. It could be because of damaged skylight or chimney flashing. It can even be because of clogged gutters.
On this page:
- Why Do Vent Pipes Leak?
- How to Check for a Roof Leak
- Dangers of a Roof Leak
- How to Seal Around a Vent Pipe
- Getting the Work Done by a Pro
- Get Quotes from Competing Contractors
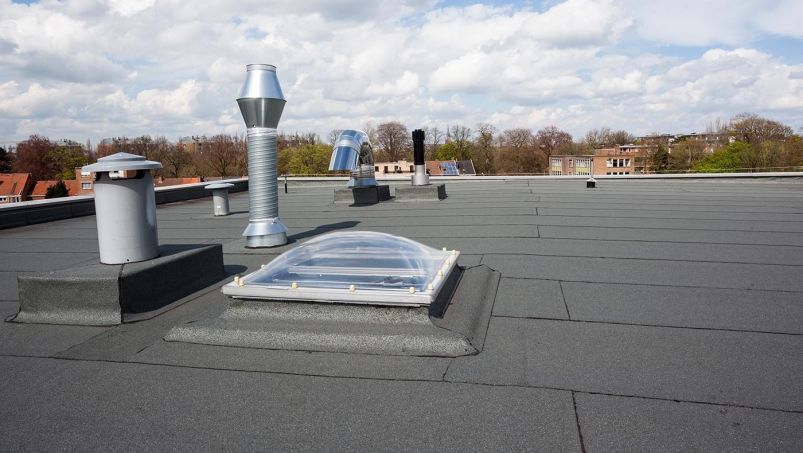
The vent pipe is also something that you should look at. Vent pipes are roof penetrations so holes are created. Even if the hole matches the size of the pipe perfectly, there will still be gaps. These gaps should be sealed. This is why they’re installed with a rubber boot.
Why Do Vent Pipes Leak?
As mentioned, there’s a rubber boot that serves as a seal to prevent water from leaking in. It basically does the same job as the chimney flashing. The rubber boot for the roof vent covers the hole and seals the gap around the pipe. This is further sealed with a sealant designed for roofs.
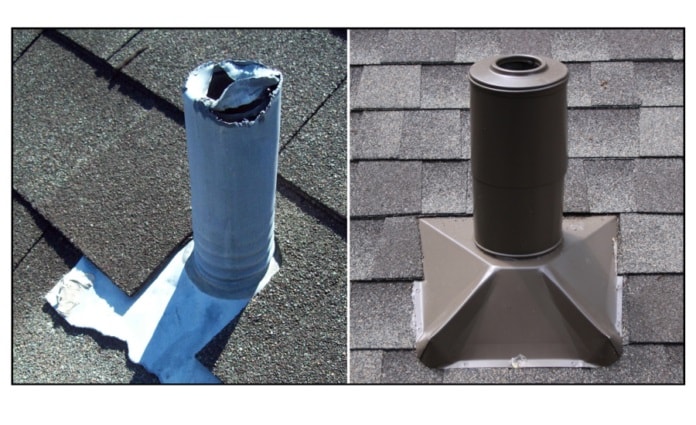
Since it’s made of rubber, the rubber boot will get brittle. This will lead to cracks, tears or damages. This essentially breaks the seal. The same thing applies to damaged sealant.
While boot repair is possible, most professionals recommend a replacement. The boot has cracked because it’s become brittle, so there’s no point in repairing it. You can simply buy the boot and sealant at your nearest Home Depot or better yet, just contact a professional so he can provide the materials needed and replace it for you.
The important thing is you create a new seal because there are dangers of a roof leak that you don’t want to expose your family to.
How to Check for a Roof Leak
Of course, you have to find the source of a leak. The best time to check is while it’s still raining. Here’s how to check for a roof leak:
- Go up the attic armed with a flashlight. Bring some chalk for marking purposes.
- Use the flashlight to look for water marks on your roof’s underside.
- Find the mark that shows the flow of water. Use the flashlight to trace it up to its highest point.
- Check around the area where it’s already dry to see where the water potentially entered. Some things to check are loose nails, valleys and vents. Mark these areas with chalk.
What if you don’t see water flowlines? Check vent pipes and the chimney. Try to see if there are water that runs down outside the pipes and chimney. If you see water running down, then it’s most likely a seal problem. This is probably the case that you’re dealing with since you want to know how to seal around a vent pipe on a metal roof.
Once it stops raining and it’s completely dry outside, go up the roof and look for the areas directly above the problem areas. You may need to look higher up. Do this only if you’re confident that you can do it safely. When in doubt, call a professional roofing contractor.
Dangers of a Roof Leak
These dangers of a roof leak should scare you into taking care of a leaking vent pipe:
- It will affect the structural integrity of your home.
Yes, even the smallest of leaks will have a negative effect on the structural integrity of your home. Let’s start by acknowledging how important the roof is. It serves as a protection against harsh weather elements so you want it to always be in good shape.
When it leaks, it will affect the ceiling and attic. Worse, the water will find its way around your home. It will go down and around your wall, floor, supports and more. You can also bet that it will wreak havoc along the way.
Obviously, this is not good. Your home is only as strong as its weakest point when we’re talking about the structural integrity so this is something that you don’t want to happen.
- It will lead to health issues.
If the threat of your home crumbling down is not enough to convince you, how about your family falling ill? Leaks will lead to water damage which provides mold and mildew the perfect environment to grow and thrive.
In case you didn’t know, mold and mildew are known to cause a wide range of respiratory issues. This is not good especially if you have kids and elderlies at home. This is also not good if someone in your family is already suffering from a respiratory issue.
You could be looking at coughing, sneezing, wheezing, difficulty breathing and more. It can also lead to skin irritation.
Did you know that leaking can also lead to chemical exposure? As mentioned, water will travel from the source of the leak to all over the house. It can pick up chemicals along the way and can spread it around the house.
- It can lead to fires and shocks.
As it starts leaking, your home’s electrical system may get exposed and we all know that electricity doesn’t play well with water. Your electrical system may get damaged as it shorts. Worse, it can lead to an electrocution when someone in your family gets in contact with it.
It can also start a fire. As weird as it sounds for water to start a fire, it can, by damaging your home’s electrical system.
- It can lead to slips and falls.
This is the first danger that you’ll expose your family to. Water is slippery. You can step on the smallest of puddles on your floor and you can slip and hurt yourself. Imagine slipping from the top of the stairs.
Think of your kids. Think of the elderlies in your home. This is a real and obvious danger.
- It can damage your belongings.
A lot of homeowners end up devastated when they go up their attic only to see their beloved belongings with water damage. We’re talking about appliances, clothes, sporting equipment, gadgets, family heirlooms and more.
- Your energy bills will go up.
This can also lead to an insulation issue. Your home’s insulation will get damaged so everything will work double time. This will understandably lead to a higher energy bill.
With these dangers of a roof leak, you just know that you have to seal that vent pipe.
How to Seal Around a Vent Pipe
As mentioned, vent pipes have a flashing and rubber boot. These provide the seal. You need to replace them if they’re damaged. Here’s how to seal around a vent pipe by replacing them:
- Pry the nails that are holding the flashing. There may be nails positioned underneath the shingles across the top row. You can remove these nails safely by first lifting up the shingles for about an inch using a putty knife.
- Loosen the shingles. You can do this by running a putty knife across 10 inches of the top row. You need to do this in order to prepare them for when you remove the flashing.
- To remove the nails securing the flashing, you have to first lift up the corner by inserting a putty knife under the corner. Position the pry bar in between the pry bar and the flashing to safely lift the nail up. Do this for all the nails securing the flashing.
- Carefully lift the flashing loose from the shingles. You need to maneuver the corners so you can safely pull the flashing up.
- There will now be a bare part of the roof because you removed the flashing. Use a utility knife to cut roofing membrane that you can use to cover this area and the pipe opening as well. Measure the pipe so you can cut a hole in the middle of the roofing membrane that’s just enough for the pipe to fit.
- Trim the edges of the roofing membrane by an inch all around. This is done because you need to overlap the flashing.
- Apply silicone caulking around the area where the vent pipe penetrates the roof. Insert the roofing membrane (with the backing removed) through the pipe. Seal the roofing membrane by applying silicone caulking in the area where the roofing membrane comes in contact with the pipe.
- Insert the rubber gasket through the pipe. You may need to stretch its opening for the pipe to fit.
- Apply silicone caulking around the bottom part of the gasket.
- Install the flashing over the pipe. You need to lift the shingles that you’ve loosened beforehand so you can position the flashing underneath them.
- Apply silicone caulking an inch from the edge of the shingles that you’ve loosened.
- Secure the flashing onto the roof by pushing it down and hammering in nails an inch from every corner. You should also secure it with nails an inch from the edge on every side.
- Drive in nails to secure the shingles back in place.
- Seal it further by applying silicone caulking across the bottom of the shingles you’ve loosened.
If these sound like a lot of work, you’re correct. It is a lot of work. In addition, there are a lot of risks involved. You can fall. You can damage the shingles and the roof itself. You can finish the task and later on realize that you didn’t do a good job. This is why this is a job that’s best left for a pro.
Getting the Work Done by a Pro
There are several compelling reasons why this should be done by a pro. These should be enough reasons for you to hire one:
- It’s safer.
There’s no need for you to go up the roof. Thus, you don’t have to risk your safety. How about their safety? They’re trained and experienced enough to ensure their own safety. Besides if in case something happens to a licensed professional, their insurance will cover for it.
- It’s faster.
Consider this an emergency and as such, you need to take care of it ASAP. A professional will find the source of the leak faster. This way, he can get started on the task before the next rain comes. Of course with his expertise, he can solve the problem at once.
- It will be done right.
This is very important because what’s the sense of fixing something that you don’t end up fixing correctly? A professional knows what to do. You see the long list above on how to seal around a vent pipe? A professional knows what to do even without looking at that list because he’s done it correctly countless of times.
Of course, you’re concerned about their rates. You do have to pay them to experience these benefits and rightfully so. You’re basically paying for peace of mind knowing that you’re safe and that the job is done quickly and properly.
This is not to say that you should blindly write a check for the first roofer that you find. You still have to make sure that you’re taking advantage of the best deal from the best contractor that you can find. This means shopping and asking around, which can be a time-consuming process. Fortunately, we’ve made it easy for you.
Get Quotes from Competing Contractors
This is the best way for you to get an amazing deal that should convince you to hire a pro rather than do it DIY. As mentioned, you need to ask and shop around. Here’s the key. Let them know that you’re shopping around for the best deal. This should encourage them to put together their best quote.
It doesn’t have to be a time-consuming process. All you need to do is to use the form that you see on this page. It asks for very basic details. Provide complete and accurate details and the best roofers that can seal around a vent pipe on a metal roof will put together their best quotes as soon as they receive these details.
Best of all, they know that you’re also receiving quotes from their competitors. This is why they’ll be sure to send their best deal so that they will be considered.
This is a free service that doesn’t require any commitment on your part. Try it today!
