
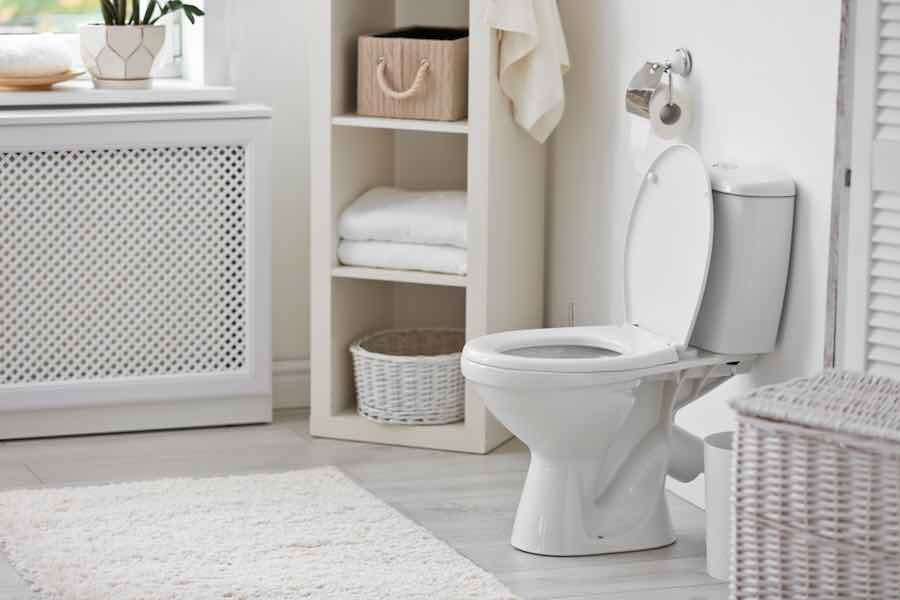
If you see water leaking onto the floor that seems to be coming from the toilet, your knee-jerk reaction would probably be to wonder where is that water coming from.
Is the tank broken?
Is there a hole or crack between the tank and the bowl for water to seep from?
Or worse, is there something wrong with the toilet bowl itself, and you’re already half-expecting something nastier to seep out of it eventually?
Let’s admit it, fixing any issue involving a toilet, especially those that involve leaking, is not anyone’s idea of a fun household chore. Unfortunately, it’s also one of the most common issues with them. Whether you have a Mansfield toilet, an American Standard one, or even the pricier Kohler – they are not failproof.
On this page:
- My Toilet is Leaking from the Bottom of the Tank
- Toilet Leaking from Tank Bolts
- How to Repair a Toilet Tank Leak
- How Tight Should Toilet Tank Bolts Be?
- How to Replace a Toilet Tank
- Getting the Help of Professional Plumbers
But the good news is, this is fixable and easy to do so. With just the right tools and a little elbow grease, you can get your dripping toilet tank fixed in no time!
So, if this is something that’s giving you a headache right now, we’ve got you covered.
My Toilet is Leaking from the Bottom of the Tank
Leaks are such a pain. When it happens, you’ll have to channel your inner Sherlock and investigate where it is coming from. Roof leaks, plumbing leaks, ceiling leaks… it can make you go crazy trying to find out the actual source.
Fortunately for you, finding out why your toilet is leaking is a lot easier to do compared to the other kinds of leaks. Since you’re only dealing with leaks coming from the toilet, you’re limited to checking out just a few reasons why it happens.
Here’s a list of the most common reasons for toilet leaks to guide you:
- Presence of cracks on the tank
- Condensation or “sweating” due to the warm bathroom air present and only cold water, instead of warm, is available in the tank because of a broken mixer valve
- The air holes present in the lid are blocked and water drips down through other openings it can find
- The level of water inside the tank is too high, so it overflows
- Damaged tubing or water hose
- Loose bolts and washers
- Failing rubber gasket
- If using pressurized toilets, the water spray may be too strong and some of the water ends up at the bottom of the tank
But if the water seems to be coming from the bottom of the tank, it can mean just any of these:
- Problem with the seal, either with the spud washer or gasket between the tank and the bowl or the toilet ball cock or fill valve
- Loose bolts
- Damaged toilet tank
If you think a toilet only leaks when flushed, this is a misconception. Toilet leaks, especially when it is coming from the bottom of the tank, are continuous. Aside from the risk of slipping because of all that water dripping onto the floor, this will also badly affect your water bill.
If you don’t know, the biggest reason for high water bills is a toilet that leaks or continuously runs. So, if you don’t want to pay hundreds of dollars for your water bill every month, get that toilet leak fixed now!
Toilet Leaking from Tank Bolts
Toilets have tanks, but they are not as impenetrable as the tanks, specifically military tanks, we are familiar with. Even if we know that toilets are built to last for years, that doesn’t mean they are completely immune from breaking down or getting beat-up.
When it comes to toilets, the first component that is likely to fail after being in use for so long is the washer found inside each bolt. Made of rubber, these washers will become brittle over time and eventually wear out.
If you traced that the water is coming from the bolt of the tank, this is the cause. Your tank’s bolts may still be in excellent condition, but if the washers are not, you’ll have a dripping toilet tank in your hands. Washers are necessary because together with the bolt, a seal is created that prevents water from leaking out.
Fortunately, it’s not that hard to get this fixed. This needs to be done as soon as possible, because the constant exposure of the bolts to all that water will cause it to corrode. When this happens, it would be harder to remove the bolts to replace the washer.
Some toilets also have metal washers installed, but these don’t really prevent water coming out from the bolt of your tank if the rubber washers are already damaged.
Although it doesn’t happen that often, those bolts can also get damaged or misaligned. And when this happens, you can also expect leaks to come out from the bolt.
Whether it’s the washer or the bolt that’s the problem, it’s a very easy fix.
How to Repair a Toilet Tank Leak
When it comes to fixing leaks at home, they are generally cause-specific. There’s no single method to fix the leaks.
Your roof is leaking? You may have a damaged roof that’s needing replacement or just missing shingles that allow water to pass through.
If you noticed water in your basement despite not having experienced any rains lately, it may be because your heater is leaking or there’s a problem with the pipes.
You found water dripping from your ceiling? This may be again because of your pipes, or water is entering from the roof.
You’ll have to fix them independently, and the kind of fix that you can do will depend on the specific issue. Toilet tank leaks, on the other hand, are not so much so. Since the leaks will likely involve its inner components, it can be resolved in one go, no matter how many problematic parts are there.
To fix a toilet tank leak, it just needs to be opened up and removed, checked, and getting the damaged parts replaced, and then put it all back together. Simple, isn’t it?
But to give you a clearer image, here’s a step-by-step guide on how this is done:
Tools needed:
- Adjustable pliers
- Screwdriver
- Wire brush (small)
- Either individual replacement washers, bolts, and gaskets or an entire toilet repair kit.
Individual components are a practical option if it’s been determined that the leak is due to faulty parts, but if the exact component causing the leak is still unknown or if an upgrade to the toilet’s components is also being considered, a toilet repair kit would be a better option
- Rags or towels and sponges
- Bucket
- ½ deep socket wrench or adjustable wrench
- White vinegar
- Level tool
Steps:
- Find the shutoff valve of the toilet and use that to cut off the water supply to the tank. There’s no need to cut off the water supply for the whole house for this task. Place towels or rags on the floor, especially under the water supply hose to catch any water that might spill.
- Carefully lift up the toilet tank’s lid and set aside in a secure spot. Use the flush to drain the water inside the tank, then get your sponge and use it to remove all the water that remains. Drain the water from the sponge into a bucket if there’s no actual drain close by.
- Find the connector of the water supply hose under the tank and disconnect it from the tank. Use the pliers to do so if it’s not possible by hand.
- Locate the toilet tank bolts that are used to connect it to rim of the toilet bowl. An easy way to do so is by looking inside the tank to find where the bolts are placed. Use the pliers to remove the nuts. Take the nuts and bolts and keep them in a safe place.
Another way to do this step is to use an adjustable wrench to keep the nut in place and unscrew the bolt inside the tank using a screw driver. Do this for every tank bolt present – there can be either two or three bolts in a toilet tank. Remove all the washers as well.
- Once all the bolts have been removed, carefully lift up the tank and either place it face down over the toilet seat, with the lid closed, or on the floor over rags or towels. Since the tank is heavy, getting extra help to lift the tank up is ideal.
- Detach the old spud gasket or spud washer from the toilet tank, as well as all its other hardware, including the flush valve.
- Clean off any gunk in the tank, especially around all the holes, before installing the new spud gasket, as well as any other hardware like a new flush valve, in place.
- Before putting them back, check if you also need to replace the toilet tank bolts, or if they can still be used. If using the same bolts, make sure to clean them up first to allow the new nuts and gaskets to be installed properly.
- Thread the new rubber washers into the bolts, and make sure that they are properly seated. Place these bolts and washers into the holes, with the bolt heads found inside the tank.
- Carefully lift up the tank and reseat it over the toilet bowl. Again, this will require more than a pair of hands to do. Lock it in place by screwing in the nuts for each bolt on the underside of the toilet tank by hand or using an adjustable wrench and screwdriver. If using metal washers, these must be threaded to the bolt first before the nuts.
Alternatively, the toilet tank may be put back in place before reinstalling the bolts, washers, and nuts. Whichever of the two methods is used, it is vital that the toilet tank bolts should never be overly tightened.
- Use the level tool to check if the tank is properly seated and at an even level. And if a new flush valve has been installed, readjust it according to the proper height of the water level before fastening it to the tank.
- Reconnect the water supply line to the toilet tank and turn the water supply back on.
Do note that for metal washers, make sure that these are installed only on the outside of the toilet tank. Installing them inside the tank together with the rubber washer will reduce the watertight seal formed between the rubber washer and the bolt, which ups the risk of a leak.
Once all these steps are done, it’s now time to check if there is still any leaks present.
How Tight Should Toilet Tank Bolts Be?
When it comes to tightening screws, nuts, and bolts, we are so used to the idea of getting them to be as tight as they possibly can. This gives us an assurance that nothing can pass through in between its spaces, as well as what it is keeping in place will not be able to move around or become loose.
A rare exception to this rule is when it comes to toilet tank bolts. It is vital that they should be tightened securely, but they must be NEVER overtightened.
You might wonder why this is so, when you’re now aware that leaks on the toilet tank can also come from the bolt. The main reason for this is that overtightening the bolts can cause irreversible damage to a toilet tank. To be more precise, it can cause cracks to form in the area where the bolts are.
When this happens, the leak can either be just a few drops at a time, or as strong as an open faucet; it’s another to-do list for you when that happens. And, you’ll also either have to get just a new tank for your toilet, or an entirely new toilet in a worst-case scenario.
So, how tight should a toilet tank bolt be? There’s no way to give an accurate answer for that, but what can be done is to tighten the bolt slowly until it gets snug. You can also do this alternately on each bolt, so that you’ll apply as equal amount of tightness for each bolt as possible. If the rubber gasket seems to expand a little as the bolt is tightened, that’s the time to stop.
But if your toilet has built-in lugs, you’re in luck because these can guide you as to when you should stop tightening the nuts. You should stop tightening up the toilet tank bolts when the lugs get into contact with the bowl
To be on the safe side, you can also choose to get a rubber gasket placed not just inside the tank but also under it. The order would be like this:
- Toilet bolt, with the bolt head inside the tank
- Washer below the bolt
- Rubber gasket below the washer
- Toilet tank
- Rubber gasket below the surface of the tank
- Washer below the rubber gasket
- Nut to secure everything
The extra rubber gasket beneath your tank will lessen the occurrence of a leak. But even with this in place, the bolt should still never be overtightened. Even an extra gasket can’t prevent a crack or two from forming in your tank because of an overtightened bolt.
The same is true as well for the bolts on the floor that hold your toilet bowl in place. Tightening them up too much can also cause damage to the mounting flange that connects your toilet bowl to the PVC drain pipe, which can be a much nastier problem to have.
How to Replace a Toilet Tank
A typical household toilet, from the tank to the bowl and including those manufactured by renowned brands like Mansfield, Kohler, and American Standard, is made out of porcelain. And as we all know, porcelain is a breakable material.
You might have noticed that the porcelain in toilets are thicker than compared to porcelain dinnerware, or even porcelain jars. So, they must be durable, right?
Not so much. And like we said in the earlier section, overtightening the bolts can already cause damage to it. Imagine how much more damaging it can be if it was subjected to a strong impact.
When a toilet tank gets cracks for various reasons, many would attempt to fix it by just applying sealants or patches. What they don’t know is that this method is not going to work in most cases. For hairline cracks where no water seems to be leaking out, this can work. Otherwise, the only fix for it is to get a new toilet tank.
While all household toilets are made out of porcelain, there’s no standard toilet tank that is compatible to all toilet bowls. This is why it is vital to make sure that the new toilet tank would fit your current toilet bowl.
If it’s a discontinued model, find one that is compatible and has the same features – try to check first with the same manufacturer as the one you have, as they usually just do appearance upgrades, and the tanks of the new models may work with the one you have.
Once you find the perfect replacement, you can then remove the damaged toilet tank. The exact steps to do so are generally the same as the process of repairing a leaking toilet tank. That is:
- Stop water from flowing to the toilet by cutting off the supply via the shutoff valve,
- Remove the lid and disconnect the water supply hose and unscrew the bolts,
- Lift up the damaged tank and dispose of it properly,
- Place the new tank in its place and install all the necessary hardware, and then,
- Secure it with the bolts and nuts.
You can always refer to our repair guide above for a more detailed instruction and a step-by-step process of doing so.
You might think that you can just add a lot of sealant to a larger crack on the toilet tank, but you’ll later realize that this is ineffective. So, don’t dismiss the idea of getting your toilet tank replaced when the damage is more than just a hairline crack.
You’ll discover that it’s the more practical option in the end.
Getting the Help of Professional Plumbers
Licensed plumbers will almost always get the repairs of a dripping toilet tank done on the first try, even if it means having to entirely replace it with a new one – it’s rare that they don’t.
On the other hand, most homeowners who go for the DIY route will rarely get it right in their first attempt. And once this happens, all the steps to repair a leaking toilet tank that we listed above will have to be repeated. Yes, you read that right – steps 1 to 12 must be done all over again until you can get the leaking on your toilet to finally stop.
Can you imagine how long it would take until you can finally use that particular toilet again if you fail to do it properly the first time? And it’s even more stressful if that’s the lone toilet you have at home.
This means running to the nearest Starbucks or McDonald’s just to use the toilet because yours is still out of order.
Not only that, you’ll also have to deal with the cleanup – it’s always a guarantee that water will end up flowing onto the floor. Whether or not you placed rags and towels to collect all that water or not, you’re still going to have to clean in one way or another.
Even if toilet tank leaks are easy to fix, they can be a very time-consuming task. If you hate the idea of spending most of your day, or even more than a day, trying to fix your dripping toilet tank, and want to make it usable as soon as possible, you should consider getting a pro to do it for you.
And to help you with the search for a professional plumber for this task, consider trying out our service, at zero cost to you!
What you only have to do is fill out our form with your details, and the kind of work that you need help with. As soon as you send in your request, up to four plumbers near you will contact you with their offers, including their quotations for the job.
Because they know that their competitors are also sending in their own offers, you’re sure that what they propose are tempting deals. And, there’s always room for negotiation with them if you find one that catches your eye.
But if you don’t, you can refuse them – no questions asked. You have the right to say no, and we won’t hold it against you.
Doesn’t that sound great? So, get in touch with nearby plumbers now using our service to get your leaking toilet fixed asap!