
Test
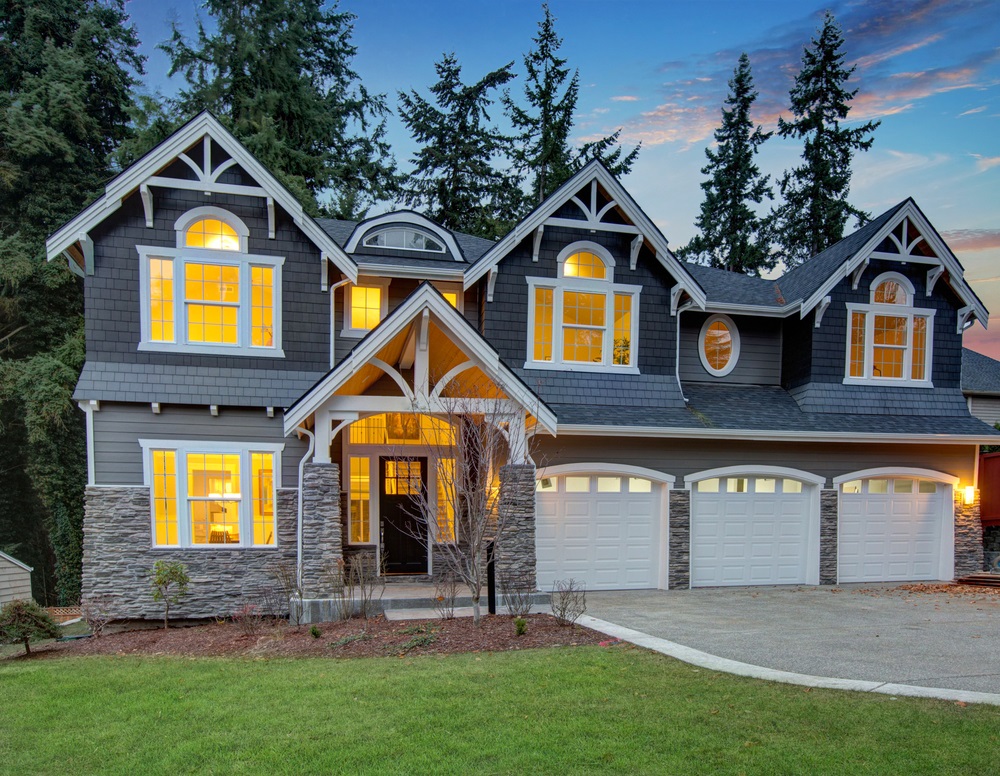
People come to us with a lot of questions with regards to vinyl siding, and what is possible to do with it, which is why we put together this neat little article to clarify some things and hopefully help you make the most informed decision.
Keep in mind that this article will have less general information about vinyl siding than the hyperlinked article, which is our attempt at answering everything you need to know about the siding material. If you do choose to go forward with the project that brought you to this specific article, we’d be happy to help you get quotes from vinyl siding installers in your area that have been screened. It’s completely free, and the worst that can happen is that you save money on your project. All you have to do to get started is simply fill out the form below.
Can You Put Vinyl Siding Over Existing Wood Siding?
The answer to that question is yes. Yes, you can put vinyl siding over existing wood siding assuming its condition is still good. If it isn’t, there will be more steps that need to take place before it becomes possible and you might need the help of wood siding repair contractors to have the bad boards replaced, which isn’t always easy to do for the homeowner himself.
A requirement is that the wood is in good condition and that it isn’t suffering from rot or mold, which could be an indication that your roof vents are not doing what they’re supposed to be doing and keeping the moisture levels under control inside the house. It also could be because you haven’t been properly maintaining the material. For instance, if you have cedar siding installed on your home, you’ll need to stain the cedar every couple of years in order to make sure it’s properly protected.
Any bad boards will need to be replaced. Other things including potential trim or windows that have been installed will need to be taken out so that you can proceed with the installation.
To answer the question, yes it’s possible as long as your current siding doesn’t have any problems and is structurally sound.
Can you Put New Siding Over Old Siding in General or Do I need to Remove the Existing One?
In most cases you can put new siding directly on top of old siding without having to remove the old siding first, and in addition it will in fact add an addition layer of insulation, thereby helping lower your energy bill. Foam board is, however, often added in order to help level out the wall when it has certain problems with it.
There are also states that provide you with tax credits when you insulate your home better, and your existing siding could make you eligible for those.
Is it better to leave existing siding on or to take it off? Some homeowners may want to take off their existing material before installing new siding, while others don’t mind installing on top of it with the benefits it provides too.
The reason why you will want to level out the wall is so that the poor condition siding behind it isn’t seen when the new layer is added on top, since siding in really bad condition could be seen through the new installation.
The curling of the existing wooden siding would cause the wall to look curvy. When that’s the case, you’ll want to take it off so that the new installation looks as good as possible. When it’s in good shape and you install on top of it, you’ll be saving yourself money that you’d otherwise be spending on having it removed and disposed of.
Fiber cement siding can however not be left on, as well as some other types of siding such as metal siding or previous vinyl. Make sure to speak to a siding contractor to see what their recommendation is in your specific case. We’ll be happy to help match you wit the most relevant contractors in your area.
Often when you’re installing new siding, it’s with an expectancy that it will be there for 50 years or more, which is why it’s so incredibly important that the necessary support is there in the form of the existing siding. Warp, curing, delamination and rot are all things that may require that it be completely replace. If there have been previous water leaks or water infiltration of any kind, those could have left damage requiring new support.
Termites, damage from wood peckers, rodents and pests are a thing that should be addressed also. If you leave on the existing material, the project will also take less time.
Benefits of Removing the Old Siding Before Installing New One
With all these mentioned benefits in the previous section, why would you in fact not just choose to leave it on, assuming it’s in good condition and it will save you money? Those characteristics are in fact very appealing to most homeowners.
- Adding a brand new substrate will inevitably have a smaller risk of developing problems.
- Removing the old siding gives you the ability to do a thorough inspection of the structural elements of your home, such as the framing, as well as the insulation.
- The warranty of the new siding may not be valid if the material is not installed as dictated by the manufacturer’s recommendations, and potential problems that would otherwise have been covered will now mean you’ll need to pay for them instead. That is at least the case with James Hardie siding
Pros and Cons of Vinyl Siding
Pros
But why would you actually choose to install vinyl since you already have wood siding installed on your home? Well, we’ll take you through some of its advantages, and then you’ll see why it’s so appealing to so many people.
- Vinyl comes in many different variants and styles – you can get a new look on your home with the versatility of vinyl.
- Modern, high grade vinyl is more durable than most wood siding materials – if you’re having high quality vinyl installed on your home, it can last a very long time and will outlast wood that will eventually start degrading, even with good maintenance.
- Vinyl is a cheap siding option, even if you go for a more durable option – the thickness of the vinyl is what will also make it more durable.
- Vinyl often comes with good warranty available, although for it to be valid, it should be properly installed.
Cons
- This material can crack or puncture and if it meets a thing such as a lawn mower, the mower usually wins.
- If it isn’t installed well on top of a surface, it can cause problems to the wood underneath.
- If you get low quality material, you’re also more likely to experience problems with it.
Vinyl vs Wood Comparison
As you can see, vinyl by itself already has a lot of benefits, but how does vinyl compare to wood?
- Premium, high grade vinyl can look better than some types of wood – for instance, if you have T1-11 or another type of plywood siding installed, vinyl can in fact have a more appealing look. While plywood isn’t that commonly installed on main buildings as a permanent solution, it might have been installed as a temporary one, and a lot of the vinyl options in fact look better than plywood.
- Vinyl doesn’t rot – if left untreated, wood will at some point start rotting, and faster in humid climates. Vinyl doesn’t have that drawback.
- Less maintenance in general – vinyl doesn’t require painting or staining as often as wood does. Wood will contract and expand more than vinyl, which may cause the paint to crack at which point you need to have a house painter come and paint it again. If you have been staining your siding instead, that is a task that needs to be done even more frequently.
- Insects and pests are no longer a problem the same way – while termites may love wood, they stay away from vinyl.
- Vinyl doesn’t rust – in comparison to metal, vinyl has the advantage that it doesn’t rust. While the material itself may not rust, rust stains could appear on the siding if the nails that were used weren’t rust-resistant.
- While vinyl can look great, nothing looks more like wood than actual wood does, so if you want to stay authentic and don’t mind the maintenance, wood looks better.
Using Vinyl or Wood For New Construction
Wood is a better insulator in general than normal vinyl is, which is why it is still such a popular material when it comes to adding it to new construction. To counteract that, a lot of people choose insulated vinyl or make sure that their home otherwise has all the insulation that they need with either mineral wool, cellulose, SPF, EPS or fiberglass insulation.
Vinyl has a lot of advantages that are being realized by homeowners, which is why it’s becoming more and more normal to install it on your house. New construction that uses vinyl will be installed on plywood typically and insulation and a moisture barrier is also used in order to keep your home well insulated.
If you’re not a fan of painting or staining the exterior of your home, and you already have wood installed on it, vinyl is a great option. The process that an installer will usually follow is listed below.
Repair Damaged Wood and Doing a Close Inspection
The state of the wood is important, especially because if it is poor condition, it can continue deteriorating underneath when it has been installed, which would cause further problems for the outer material at a later stage. The inspection should also include actually making sure that all the boards are steadily fastened to either wall sheating or studs.
Windows, doors and trim must be taken off at this point. Any uneven surfaces must be fixed in order to prepare for the new installation. Gutters and outdoor light fixtures also pose potential problems in the process and should also be taken off.
Securing a Flat Surface to Install it on
You can’t just immediately install the vinyl on top in a lot of cases because it needs to be installed on a flat surface. What that means is if you currently have a type of lapped siding that isn’t flat, such as bevel or clapboard, you will need to install vertical furring strips. They’re installed 16 inches apart and on top, rigid foam board is added which provides the necessary flat surface.
The furring strips are nailed to the wall studs with moisture and rust-resistant nails
Does The House Have a Moisture Barrier Underneath the Wooden Siding?
If your home doesn’t already have a moisture barrier installed underneath the wood siding, one must be installed before the vinyl is installed. A polyethylene moisture barrier is one of the more common options. Broad headed nails are used to secure the moisture barrier on top of the rigid foam. The nails have plastic washers below the heads to protect the polyethylene. In order to ensure that the moisture barrier works, the seams are sealed. Make sure that the moisture barrier you choose to go with live up to the building codes in your local area. Trim coil, roofing felt or house wrap are other materials that homeowners go with as a moisture-resistant barrier.
Corners should be flashed with a water-resistant material 10 inches to each side of the corner to ensure protection.
Window and Door Frames Are Adjusted to Accommodate the Wall Now Being Thicker
Since the walls are now thicker than they used to be, so do the frames of doors and windows also need to be. If you have other types of openings, these also need to be adjusted to the thicker wall so that it looks nice and provides protection against the inner layers too. The difference in thickness comes down to the additional layers that were added in the process that included vinyl panels, the added insulation, and foam boards.
Doors and windows will need new flashing to provide moisture-resistance, and this should be made from a non-corrosive metal to make sure moisture stays out. All other utilities sticking through the wall will also need to get new flashing, including the faucets and more.

Installing the Initial Fastening Strips
The initial fastening strip is a key part of the installation since it creates the starting point for the vinyl siding installation. If this part starts out not being level, the rest of the installation also will not be. The panels interlock which is why all unevenness will be seen later on so you should start out by getting this properly installed. Draw a chalk line around the house roughly an inch above the lowest part of the wood siding.
The installation of such a strip will help strengthen the installation and is where the lowest panel will be attached to. Vinyl siding is installed with a gap on both sides since it tends to expand during weather changes, and leaving this space will allow for that expansion to not cause any problems. 1/4 inch is the generally recommended amount of space.
When the nails are hammered to the backer board, do so in the middle of the nailing slot. While this may sound counter-intuitive, it should be done so as to allow the material to expand and if done correctly it will let the material slide within the limits of the nailing slots.
Choosing the Right Nails for the Installation
An important part of the installation is in fact choosing the right nails. Your siding material will be exposed to water, wind and maybe even frost for many years to come, which also creates certain requirements for the nails to avoid boards going loose and stopping the nails from corroding or rusting. Yes, you probably guessed it. That’s why you’ll either need to get stainless steel nails or galvanized-steel ones or any other type of nail that will not corrode or rust.
Stainless steel nails are the more expensive option of the two. You can also use either nails, screws or staples to secure it in place. When you are attaching the panels, you shouldn’t nail in the nails completely as it would lock the panel in place and not let it slide back and forth. Leave a tiny amount of space, about the space of a nickel that will still let the panels be flexible.
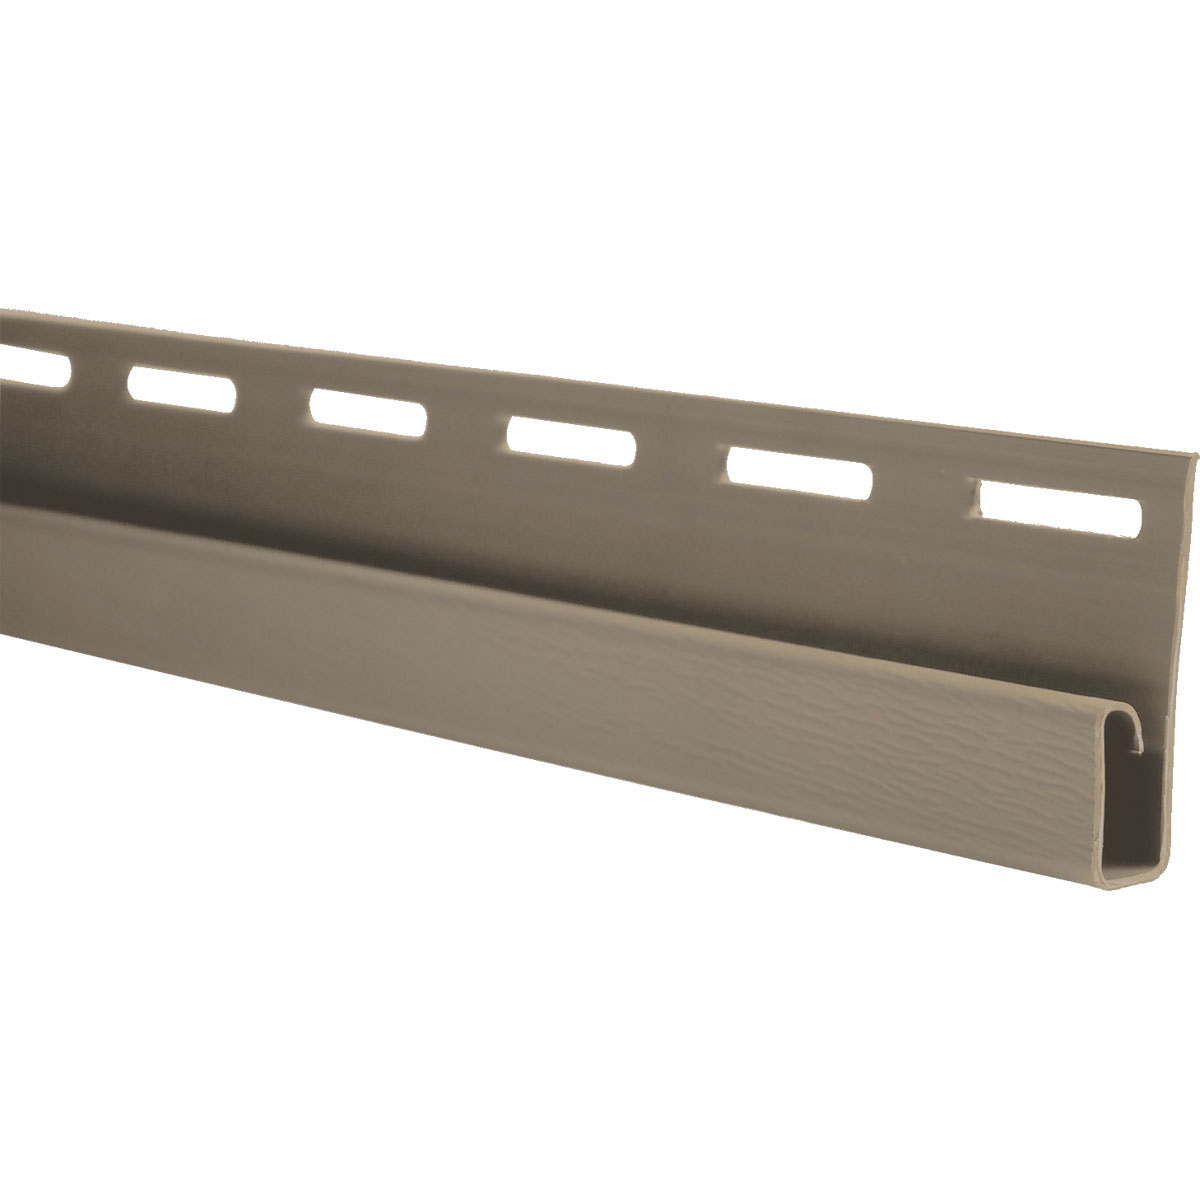
Fastening the Siding at the Ends Using J Channel and Utility Trim
If the siding was simply installed without having anything securing it at the ends, it would become very vulnerable to anything catching on to it and easily tearing it off. You clearly don’t want that to happen, which is why J channel strips are used to keep this from happening. J channels are sometimes referred to as corner channels also, and their name comes from the shape that they have. The J-shape allows it to properly hold things in place. These are installed vertically on the corners. They’re also used with other openings such as door and windows.
This is what the J channel looks like.
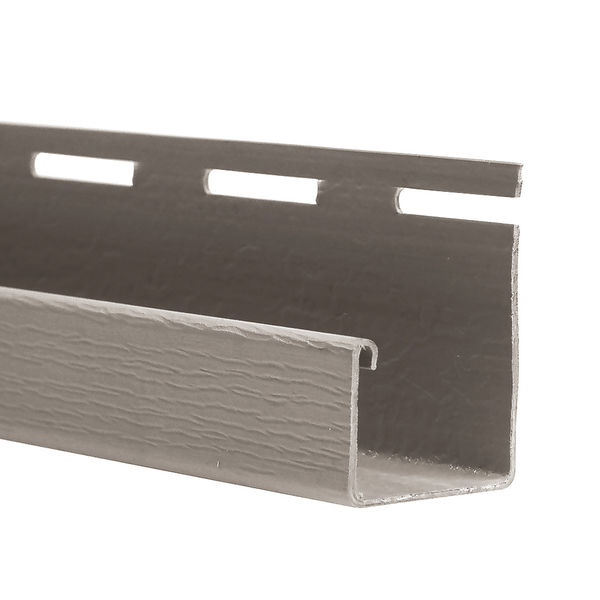
Photo credit: Foundry Specialty Siding
Remember that the installation should allow for enough space for vinyl to expand. Utility trim is used in combination with the J channels around windows and below roof soffits.
One Panel at a Time
While vinyl lap siding is the easiest kind to install, it still happens one panel at a time, starting from the bottom starter strip. Once you have attached the first board to the starter strip, you will want to check that it was level in its installation. The ends are then pushed into the J-channel on the ends. Hooray, your first board is now in place once everything is level and the foundation has been laid for the installation to continue. You may not always be able to have a panel span the whole length of the wall, which means the different panels will need to overlap. To provide a protective seal, the overlap will need to be roughly 4 inches, although there still needs to be 1/4 inch of space available inside the J-channel for expansion. Even when overlapping, the boards should be able to move from side to side with the nails being attached in the middle of the holes.
Improve the Aesthetics By Making Sure the Inevitable Seams Look Nice
You are also installing this material to provide curb appeal, and in that process you will want to ensure that the seams between overlapping panels do not align vertically. This is the general recommendation that you don’t have a full line of seams that go down across a wall but that they’re spread apart and don’t line up. To keep this from happening, the installer will need to cut the siding accordingly.
Panels are also cut so that they can fit around windows or doors. While not the best solution, a utility knife suffices to get this job done. Contractors will have better tools for the purpose but if you’re trying to do the installation yourself, you can get it done with nothing but a utility knife.
As you go along with the installation, it’s important to ensure that things keep staying level so that you don’t notice problems when you’re done and you step back to look at the final product. The easiest way to mess up your installation is by not having the tops stay aligned going around the house. The easiest way to ensure everything is level is therefore not to start on one side of the house and immediately work your way to the top for it but rather working around the house instead. It simply makes it easier for you to ensure continuity and that corner panels are aligned.
Dealing With Windows
As you’re cutting the panels to accommodate to the fact that you have windows and other things that makes the installation a bit more complicated, which is where you will need a snap-lock punch. What it does is it creates a surface that can easily lock in with the utility trim that you installed around the windows. The lugs are then pushed into the utility trim to help keep the board in place
As you can see, it’s possible to install it over existing siding, but it’s still a decision you should be making with your contractor regardless. While installing the big individual boards yourself may be manageable, the process becomes significantly harder once you get to the more difficult parts such as windows.