
Tap tap tap.
Hearing that sound just drives you up the wall, doesn’t it?
Leaking water from the ceiling is not just a mere nuisance. It also poses dangers you can’t afford to ignore. Those issues may not be apparent at first, but ignore them long enough and you’re bound to suffer the consequences.
For starters, taking the appropriate action in the case of a leak will save you hundreds, maybe even thousands, of dollars.
So, what exactly do you need to do if you see water leaking from your ceiling?
On this page:
- Dangers of a Water Leak (And Why You Shouldn’t Wait)
- What to Do When You See Water Leaking From The Ceiling
- How to Fix Roof Leaks
- Common Causes of Ceiling Leaks And How To Identify Them
- Importance of Drying the Ceiling (And How To Do It)
- Getting Quotes from Competing Contractors for Ceiling Repair
If that question stops you in your tracks, then you’ve come to the right place.
In this article, we discuss in extensive detail the steps you need to take to address a leaking ceiling.
You ready? Dive right in.
Dangers of a Water Leak (And Why You Shouldn’t Wait)
The dangers of a water leak range from the minor to the serious, but none of them should be ignored. Let’s go over the attendant risks of water leaks one by one.
Structural Damage
When your ceiling leaks water, the first casualty is usually the attic area along with the items that it contains. The drip, however, may also penetrate into the walls, the flooring, and your home’s foundations.
This is a disaster waiting to happen. After all, wood tends to rot, warp, and deteriorate if exposed to moisture for a long time. Allow water to have its way with the wooden parts of your home long enough and some parts of your home may collapse under their own weight.
What’s frustrating about structural damage is that it’s not always noticeable until it’s too late. Quick action is imperative as soon as you see the first signs.
Insulation Damage
Insulating your roof can help regulate the temperature in your home, not to mention save you up to 30% in energy bills. That said, ignoring a leaking ceiling is one of the best ways to make your insulation materials go kaput.
That’s not in the least surprising. If water has penetrated your ceiling, there’s a good chance that it may have come in contact with your insulation materials. This causes your insulation to clump and deteriorate, which negatively impacts its effectiveness.
Slips and Falls
Water leaks obviously create puddles and water trails on the floor. People can get hurt, and sometimes the results can be fatal. If you’re running a business, puddles on the floor not only make accidents happen, but they also make you liable for compensation claims and lawsuits.
Mold Buildup
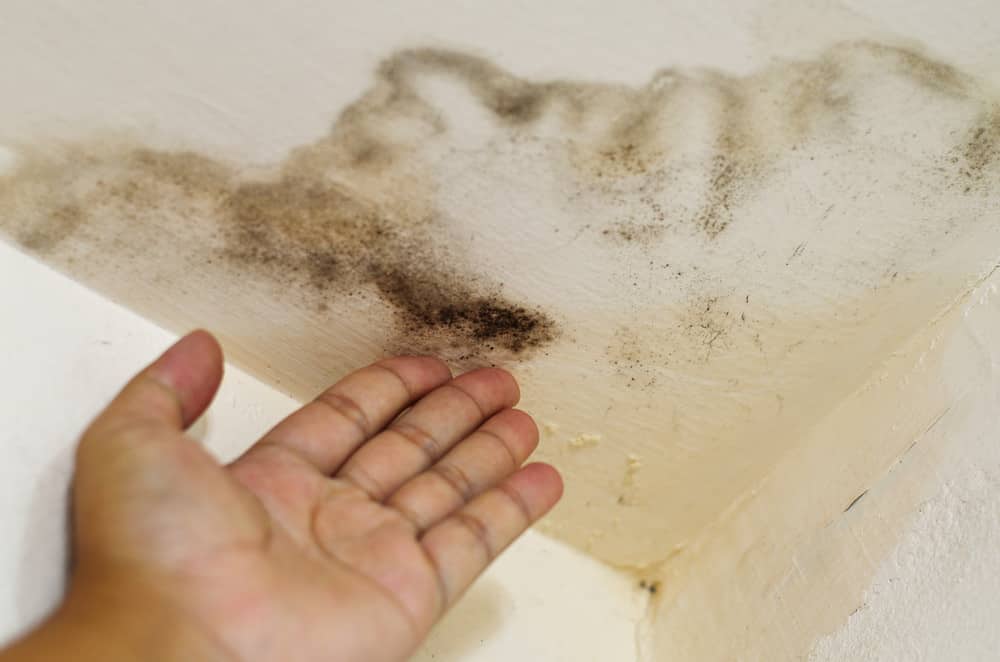
Mold love moisture. If you don’t lift a finger to fix your leaking ceiling and address its symptoms, you run the risk of mold and mildew spreading in your home. It can invade your curtains, carpets, clothing, furniture. Mold is not only unsightly, but they can also cause wood to rot, which can lay waste to your home’s structural integrity.
And it gets worse. Exposure to mold may also cause health hazards, including coughing or wheezing, eye irritation, runny nose, and an itchy throat.
Did the water leak cause mold growth?
Mold and mildew are pretty hard to miss once they’ve taken root. These black or white spots are difficult to deal with, even more so when they settle on hard-to-reach areas like crawl spaces, the undersides of sinks, inside walls, and floor coverings. They are not only ugly to look at, but they also give off a rank odor that could pose health risks.
So, was the mold buildup caused by the water leak? You can find out by looking for:
- Wet areas on or near areas where mold is found
- Stains on walls or ceilings near the infested area
- A drastic increase in the cost of your water bills
- Musty odors
Shock and Fire Hazards
Everybody knows that water and electricity don’t mix. When there’s a leak, there’s always the risk of moisture coming in contact with electrical wires, conductors, or electrical metal boxes. Insulation may protect you from electrical shock, but do remember that electrical wires may break or fray over time. Water may creep towards open electrical wires, posing a risk to anyone who would get near it. The point? It’s always better not to risk it.
Electrical reactions may also cause sparks, which may lead to electrical fires. And no, you can’t put out the fire by throwing a bucket of water on it. Water and electricity don’t mix, remember?.
If you see a leak in your ceiling, you’d do well to shut down any electrical circuits that run through the affected area before finding the source of the problem.
Accelerated deterioration
The general rule of thumb is to always keep your home dry, at least most of the time. There’s a good reason why we wipe counters and sinks immediately when they get wet. However, getting rid of moisture isn’t a simple endeavor anymore when it seeps into your attic, roof decking, walls, and foundations.
What to Do When You See Water Leaking From The Ceiling
Now that you’re aware of the attendant risks that come with a leaking ceiling, it’s about time you get familiar with the steps you need to take to deal with the problem.
Contain the Leak
You can’t just allow water to come in contact with your furniture, electrical appliances, flooring, or walls in the event of a ceiling leak.
Protect your floor from moisture by laying down towels and old newspapers on them. Big buckets will also come in handy for heavy leaks. If the water is dripping onto an uneven surface, pin one end of a string to the spot where the leak is coming from and then pin the other end to a catch basin.
You also want to move your furniture, electronic devices, and other personal belongings in a place where water can’t reach them.
Release the Pooling Water
If your ceiling is leaking and part of it is swollen, chances are pooling water has caused it. All that water puts heavy pressure on your ceiling. It may eventually collapse in on itself if you don’t do anything about it, causing more water to pour into your home.
To prevent the affected area from collapsing, poke the center of the bulge with a sharp object to release the built-up water. You’re possibly dealing with large volumes of water, and chances are it’s infested with pollutants, so it’s important that you do this carefully.
Make sure to put on some safety goggles and make sure that you poke an area where the water won’t spill onto valuable items or electrical wires.
Steps
- Lay down a plastic cloth over the floor beneath the affected area.
- Place a big bucket directly under the area of the ceiling where drips are coming from.
- Using a drill with a ½ inch twist bit, poke a small hole in the center of the dripping area.
- Expect the build up water to flow down into the bucket.
Find the Source of the Leak
Before you can repair a ceiling leak, you have to find its source. Otherwise, the leak will just keep coming back, making all your previous efforts amount to nothing.
Do you have access to the attic area? If yes, go up there and find the exact spot where the water is able to penetrate the roof.
Bear in mind that the damaged area on the roof is not always necessarily above the spot where the water is dripping through the ceiling. The water may have flowed along the lining of an insulation material or a sheathing. If it’s the former, you can trace the source by checking for discolorations on the roof’s underside Once you find the spot where water is entering the roof, poke a metal wire through the gap so that you can see it from the outside.
If you don’t see signs of damages on the roof, chances are the leaks have been caused by an issue with your flashing, shingles, or vents.
How to Fix Roof Leaks

Once you’ve verified that the leak is due to a hole on the roof’s surface, your next step is to patch it up. Now there are many ways to fix a roof leak, and the best method depends on the severity and the nature of the damage. If the damage is minor, sealing the damaged area with a roofing cement might do the job. In severe cases, replacing the shingles altogether might be the best option.
Temporarily Cover the Roof
Once you’ve learned where the leak is coming from, you can temporarily cover the roof to prevent water from invading your home.
The most effective way to do this is to cover the source of the leak with a tarp.
Before you do that, make sure that you buy a tarp that can withstand harsh elements.
A tarp should be:
- Bigger than the damaged area (all sides must extend past the damaged area (at least 3’)
- Thick
- UV Protection (the tarp should be able to handle exposure to sunlight
You can tarp a leaking roof either with nails or without nails.
Fix Asphalt Shingles
If you discovered that the leaky roof is caused by curled up asphalt shingles, simply smooth them out and then apply a roof sealant under the corners using a caulking gun. Push down on the shingles and then seal the edges with roof cement using a trowel.
If you find that the shingles are too hard or brittle, you can soften them by applying heat using a blow dryer.
If the reason for the leak is a cracked shingle, simply replace it with a new one. To remove the damaged shingle, lift the edges using a pry bar and pull out each nail using the claw end of a hammer. Remove any leftover cement by scraping at it with sandpaper.
Call a Professional
Once you’ve done all the DIY work necessary to at least temporarily fix your leaking problem, feel free to give yourself a pat on the back for a job well done.
However, if you want a more permanent fix, the best course of action is to leave it to professionals. The same rule applies if you’re not exactly the DIY type. After all, getting up on the roof while trying to figure out what to do is a dangerous thing to do.
And if you’re going to hire a professional roofing contractor to fix the issue, make sure that you find a contractor that has the right license. This ensures that you’re getting quality service and that you’re protected from any liabilities involved with the repair. It’s important that you realize that Texas, Indiana, Washington State, Georgia, or whatever state you live in, they all have different licensing requirements. We’ve made it easy for you to find out if your contractor carries the right licenses for the work.
Do You Need Ceiling Repair?
Spotting a ceiling leak isn’t so difficult if you know which signs to look for. Leaks vary in size. Sometimes they’re as clear as, well, a drop of water falling on top of your head. Sometimes they become only once the leak has gotten worse.
But one thing’s for sure: You can ignore them at your peril. Ceiling leaks not only damage your ceiling but also your walls, furniture, and your home’s foundation.
Here are the signs that there’s a leak in your ceiling.
- You see water stains on the drywall and on the ceiling.
- Ceiling is sagging
- Drywall is bulging
- Mold growth
Common Causes of Ceiling Leaks And How To Identify Them
A ceiling can leak for many reasons. While it can be difficult to pinpoint the cause of a leaking ceiling, it’s not impossible if you know where to look. Here are the common reasons why your ceiling is leaking.
Leaking roof
If you see signs of water damage from the ceiling right below the attic, then it’s a certainty that you’re dealing with a leaking roof. Unless you have plumbing pipes or appliances that deal with water in your attic, the leak has no other possible source than the roof.
Here are the symptoms that the ceiling leak was caused by a leaking roof:
- The leaks happened right after a heavy rain.
- You have ice dams along your roof’s eaves.
- Insulation in the attic is soaking wet.
Damaged pipes
Pipes may burst or crack after years of long use, leading to leaks in the ceiling. A leaky pipe is a disaster waiting to happen since even mild leaks can lead to considerable damage to your home’s walls, ceiling, flooring, and foundations.
The problem with damaged pipes is that most of them are hidden behind walls, underneath floors, and in crawl spaces. Yeah, they can be pretty hard to spot.
If you see signs of water damage in or near the bathroom, kitchen, or areas where pipes are installed, it’s highly likely that the ceiling leak was caused by damaged pipes. Leaks from plumbing issues typically involve clear water and you’ll notice that the dripping is continuous rather than intermittent.
As soon as you notice that your ceiling is leaking, you can stop the flow by shutting off the main valve. With that done, you need to find where the leak is coming from. There are specific steps you can take to detect leaky pipes in your home.
Once the faulty pipe has been identified, your next step is to replace the fittings. Most pipes are made of PVC or ABS, so make sure that you’re getting the right type of fittings before you buy new ones from the hardware store.
Clogged Gutters
Gutters facilitate the proper drainage of water as soon as it lands on your roof. Without it, water can back up on the roof and seep between the fascia and the facade of your home. Some of it eventually goes to the cellar area, the back of the walls, and through the ceiling. If you want to avoid water damage, make sure that your gutters don’t have blockages that prevent water from being redirected to where they’re supposed to go.
Faulty Appliances
A leaky ceiling might also be caused by a faulty appliance that uses water, such as a dishwasher, a refrigerator, a washing machine, a bathroom sink, etc.
A refrigerator with a blocked defrost drain, for example, can lead to ice buildup, causing melted water to leak out and seep into the floor and onto the ceiling of the lower floor. You might want to go check for signs of moisture around and under your washer. Make sure that you check if there’s a rip on the main drain hose as well.
Leak in an upstairs toilet
It’s possible that a ceiling leak may have been caused by a leaky upstairs toilet. So, go up there and check the floor for water trails or any discolorations in the tile. More often than not, a leaky bathroom is caused by a damaged seal in the wax ring that connects the toilet with the bathroom floor. Flush the toilet and monitor closely if it causes water to drip towards the bathroom floor. If you see a trail, chances are it’s what’s causing the ceiling below to leak. In this case, the best solution is to replace the wax ring with a new one.
Importance of Drying the Ceiling (And How To Do It)
If you’re able to stop the ceiling from leaking, the next step is to dry it out.
Many homeowners leave out this step and suffer the consequences as a result. As already mentioned, water attracts mold and mildew. If the ceiling and the cellar stay wet for a long period of time, then don’t be surprised if they soon become infested with these growths.
It takes up to 72 hours for mold to take root so you need to dry out the ceiling (both above and below) fast!
Before you begin, you need to ensure that your floor, furniture, and home fixtures are protected. Laying down a tarp over them will do the trick.
The next step is to dry out the area below and above the ceiling. There are many ways to do this, and the best method depends on your circumstances. You can use towels, a blow dryer, a vacuum, or fans. You can even use a combination of them.
Are there puddles of water in some areas of the ceiling? Go ahead and drain the water into a bucket, as explained in a previous section.
It’s possible that the steps above won’t be enough to completely dry out your ceiling. Most flooring or ceiling materials, after all, have a knack for absorbing and holding moisture. If all else fails, you’d do well to perform structural drying, which will involve some equipment.
At this juncture, you’re better off hiring a specialist, not only because they have the equipment needed to do the job, but also because of their expertise.
The following are advanced methods specialists perform to dry out your ceiling. Take note that the recommended method depends on the severity of the water damage as well as the dimensions and limitations of your home’s interior space.
- Infrared Drying. infrared light.
- Focused Heat Drying
- Directed Air Movement
- Containment
- Injectidry Systems
Getting Quotes from Competing Contractors for Ceiling Repair
Now that you’ve reached this far into the article, chances are you’ve come to a decision to hire a professional contractor who can repair your leaking ceiling. Or maybe you’re only entertaining the notion but don’t have any idea on how to proceed.
You also want to make sure that you hire the contractor who understands your needs and knows how to do the job efficiently. At a fair price.
Because let’s face it: This is your house we’re talking about. You don’t want to get the short end of the stick when you’re dealing with a contractor.
We’d love to help you take the first big step to find a contractor that who will be worth your while.
And how do we pull this off?
For starters, we have a massive database of screened contractors in the U.S. And there’s a high probability that the perfect contractor for you is in there somewhere.
All you need to do is fill out the form found on this page and your information will be sent to the contractors that match your criteria. With this done, you can expect to receive around 4 quotes in no time.
Bear in mind that there’s no commitment involved here. If none of the quotes are to your liking, you’re well within your right to ignore them.
Has your leaking ceiling bothered you long enough? Take the first step to fixing that leak by filling out the form!