When water starts leaking from the gutter, you know you’ve got your work cut out for you. Gutters, after all, protect your home against moisture, directing water away from your home’s windows, siding, foundation, and other areas of your home you’d prefer to keep dry. You can’t just sit idly by and allow a leaky gutter to wreak havoc to your home.
Allow water leaks to persist long enough and your home is bound to suffer from water damage, which can ultimately compromise the structure of your home.
If your leaky gutter is becoming a serious problem and you’re about to press the panic button, fret not. A water leak may have its attendant challenges, but you can fix your gutter leak effectively if you know the proper procedures.
On this page:
- Water Leaking Between Gutter and Fascia
- Dangers of a Water Leak
- Signs You Have Problems with Your Gutters
- How to Inspect Your Gutters
- How to Install Gutter Flashing by Yourself
- Getting Quotes from Competing Gutter Contractors
And when it comes to procedures and solutions related to gutter work, we have your back.
With that said, some bit of familiarity with how gutters work is integral to the effective execution of these procedures and solutions.
But first, let’s discuss you can’t afford to ignore a leaky gutter.
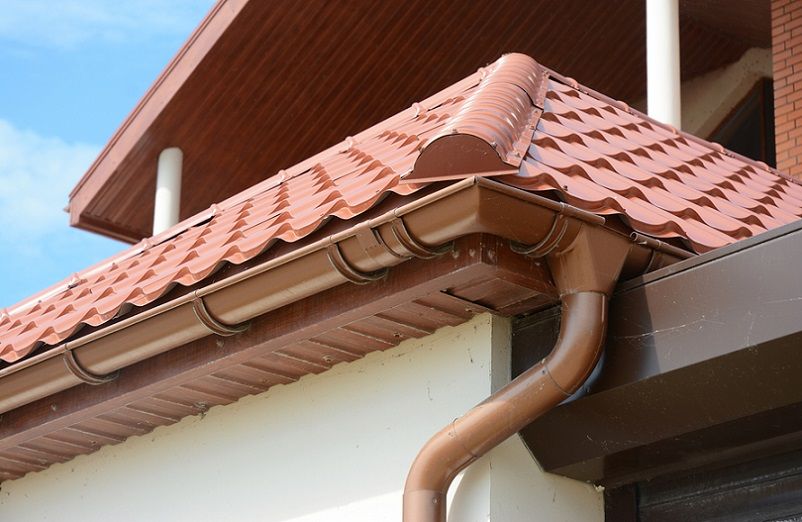
Water Leaking Between Gutter and Fascia
When there is rain, the water is expected to roll down the roof and into the gutters. The gutters then direct the water to a downspout, allowing the water to run down until it reaches the ground.
But what happens when your roof’s gutters become worn out or cracked or clogged? The water travels to places where it shouldn’t be going, most probably between the gutter and the fascia, all the way down to the side of the house or straight into the ground.
It goes without saying, but it’s integral that you check your gutters for leaks regularly or at least after a storm.
Dangers of a Water Leak
When water that falls on your roof is going where it shouldn’t, chances are the problem lies with your gutters. Are they overflowing? Are they clogged? To find out for sure, you need to grab a ladder and go up there. It’s not a fun task to do, and it can be tempting to postpone the job at a later date. The water has not penetrated the interior of your home, yet… so it’s probably not a big deal, right?
Wrong. Ignore a leaky gutter long enough and the consequences will be dire. Here are the dangers of a leaky roof every homeowner should know about.
Damage to the Siding
The siding, along with the roof, is your home’s first line of defense against external elements. However, your siding can only handle so much. If your gutters are not directing the water to the downspout system, the siding takes the brunt of the torrent, resulting in wear and tear as well as water damage.
When the siding becomes damaged, there’s a higher risk of the water running into your walls, which could lead to mold growth, structural damage, and a compromised foundation. It is for these reasons why you must check your siding after every storm.
Damage to the Roof and Fascia
Gutters are supposed to direct water away from your roof and into the ground. If the gutter is clogged, some of that water will back up on the roof, soaking it. And it doesn’t stop there. Some of the water may leak behind the gutters, down towards the soffit and the fascia. Left long enough, the water runoff will cause damage to the roof shingles as well as your home’s facade.
Damages your home’s foundation
A compromised gutter system can also cause rainwater to gather around the foundation of your home. Your home’s foundation can only handle so much floodwater, and it’s likely to develop cracks (or widen them) if you don’t do something about it.
As water seeps in, it can cause your home’s structure to become unstable, sometimes even causing the walls to separate from the foundation. When water is always pressing against your home’s foundation, there may come a time when your home collapses under its own weight.
Mold Infestation
Where there’s moisture, there’s always a risk of mold infestation. Mold is not something you can’t just ignore. It’s not only unsightly, but exposure to it can also cause health issues. Symptoms of mold exposure include respiratory issues, throat irritation, coughing, sneezing, nasal congestion, breathing issues, and more
Mold can also cause major damage to your home, particularly by causing wooden materials to decay and deteriorate over time. There are also different types of mold to know about – red, black, pink among some.
Damage to your Landscape, Driveway, and Pavement
Water leaks from a damaged gutter can take their toll on your home’s yard space, including your landscaping, driveway, pavement, and garden. While plants and trees are resilient to flood damage, allowing residual water to stay too long can compromise the composition of the soil as well as the lay of the land, especially those whose soil is loosely packed.
Your home’s driveway and pavement are potential casualties to water leaks as well. While it’s hard to imagine concrete getting damaged due to water, frequent exposure can cause the water to seep into its nooks and crannies. This leads to the deterioration of its incumbent minerals causing the concrete to crack and develop gaps.
Electrocution
It’s no secret that electricity and water don’t mix. Allow the water to leak between the gutters and the house’s fascia and it may eventually come in contact with power lines or any electrical source both inside and outside your house.
Signs You Have Problems with Your Gutters

Gutter issues are not always easy to spot. Here are the “subtle” signs you need to look out for:
Stains on slabs or the siding
Discolorations on the slabs or the siding of your home might be telltale signs that there’s a leak. When your gutters aren’t working as they should, water could leak through or overflow, causing it to come in contact with the home’s exterior. This, of course, results in mold growth, rot, and corrosion on the home’s facade, causing discolorations that can negatively impact your home’s curb appeal.
Leaks or moisture in the basement
Water leaking from your gutters doesn’t stop near your home’s foundation, it can also penetrate the basement. Flooding in the basement is an issue that, if unattended, could lead to serious consequences. Not only does pooling water cause your home’s foundations to crack, but it can also compromise the structural integrity of your home, and the home’s framing.
Mossy exterior wall
If your home’s exterior is “growing,” then chances are the constant water runoff is providing the spores a food source to feed upon, which can cause mold or moss to grow.
Sagging gutters
If your gutter is pulling away from the roofline, chances are it collapsed under too much water pressure. That water buildup may have been caused by a clogged gutter, so check for leaves or debris that might have been stuck here and there, causing water to pool up. Gutters aren’t made to support standing water for too long, so make sure to check them regularly for clogs
Leaks inside the home
Damaged gutters can cause water damage to that area where the ceiling meets the exterior walls, causing the water to penetrate the inside walls and subsequently your home’s interior.
Peeling exterior paint
Water runoff is usually the cause of flaking or peeling paint on a home’s exterior. When moisture seeps through coats of paint, it causes the layer to flake and separate from the walls. Peeling paint on a home’s facade is not only unsightly, but it’s also a sign that your gutters are in need of a replacement or repair.
Missing or damaged shingles
Overflowing gutters can cause rainwater to back up on the roof, soaking it. All that water can have a cumulative damaging effect on your roof’s shingles. Damaged or missing shingles allow water to penetrate the attic as well as your home’s interior.
Gutters are not properly sloped
Gutters look like they’re parallel to the roofline at first glance, but look at them closely and you’ll notice that they’re sloped ever so slightly. This is done by design so that the runoff water can flow downhill towards the downspout. To drain properly, a gutter should have a minimum slope of a ½ inch for every 10 feet. Improperly sloped gutters are also prone to standing water and the water pressure could cause them to break under the weight. Simply put, make sure your gutters are properly sloped or you’ll end up with a water leak.
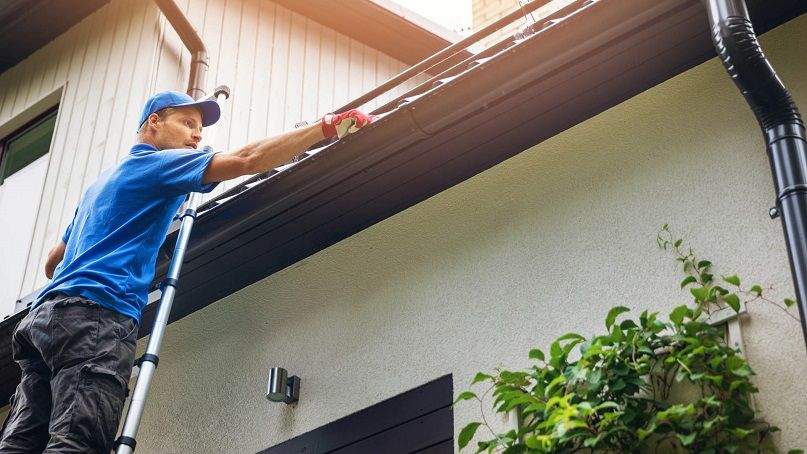
How to Inspect Your Gutters
If you suspect that there’s a problem with your gutters, the first order of business is to check them yourself. The following are the steps to do just that.
Go up there, but safely
The only way to inspect your gutters yourself is to go up there using a ladder. It goes without saying that you need to take safety ladder precautions before proceeding. Don’t forget to enlist the help of a friend to hold the ladder for you as you climb the roof. Better to be safe than sorry.
Check for any debris
Gutters have a knack for collecting debris over time, causing them to clog up. This negatively impacts the way your gutters drain water, resulting in water leaks.
One standard way of clearing the debris from your gutters is to flush them out with a water hose. For heavier debris such as twigs or large leaves, you can simply sweep them into a bucket until there’s nothing left. For debris that are stuck in the above-ground downspouts, stick the hose to the bottom and turn on the water until they’re flushed away.
Check for damage
You also need to check if your gutters have sustained any damages from storms or other natural disasters. A damaged gutter, after all, can lead to drainage issues that eventually lead to water leaks.
Examine the gutters. Are some sections sagging or broken? Examine the seams closely for gaps or loose screws as well. Don’t forget to do the same for the downspouts.
To make sure that you haven’t missed a spot, you can perform a water test using a hose. After identifying the problem areas, you can start performing the necessary repairs. Once you’re done with the initial repairs, perform a water test again and see if you’re still getting leaks.
Inspect your Home’s Surroundings
Another effective way to determine if something’s wrong with your gutters is to check your home’s surroundings. Do you see signs of standing water around your home? If there are, that could be a sign that your gutters are in need of a repair or a replacement.
How to Install Gutter Flashing by Yourself
Gutter flashing, the same way as roof flashing, is an integral part of your drainage system for two main reasons. First, they help divert rainwater from one area to another. Second, gutter flashing increases the efficiency of your gutters, ensuring that the water is going where it’s expected to go. In other words, they prevent water from backing up behind the gutter and then leaking into the fascia and soffits.
Gutter flashings are typically installed beneath the roofline and inside the gutters themselves.
While you can buy gutter flashings by the foot, an entire package is typically 12 feet long and has a dimension of 2×3 inches. They are pre-cut to fit over the gutter and under the shingles for easy installation.
Gutter flashings come in aluminum or plastic. If you prioritize durability, choose aluminum, especially if you live in a location prone to rainy weather. If your gutter system is complex, plastic gutter flashing might be the ideal choice because of its easier installation.
So with that out of the way, here are the steps for installing gutter flashing to your roof drainage system.
Step One: Evaluate
Every installation project requires planning and evaluation to ensure that everything fits together and goes according to plan. Are the fascia and soffits in good condition? If not, you’re better off replacing them first. In fact, it’s always better to install gutter flashings when you’re working on a flat plane.
Step Two: Measure
Your next step is to determine the exact dimensions of your home’s roofline. This is so you can choose the right length and cuts for your gutter flashing.
Grab a sturdy ladder and go up to the roofline with a tape measure on hand. Measure all the sides and record the measurements on a piece of paper. Get the total number of feet by adding the four sides together. Divide that sum by 12 to determine the number of flashings needed to complete the installation. Make sure to add a few feet of flashing to account for odd portions that may be required to complete the installation.
Step Three: Do a Sketch
Once you’ve recorded the roofline’s dimensions, do a sketch that illustrates how the gutter flashing fits into the gutter system. Once you’ve calculated the required length of the gutter runs, you need to note the downspout locations. Remember, you’ll need three elbows for every downspout, with each elbow turning to the side or the front. While most gutter installations only require front elbows, a side elbow may be needed to direct the downspout sideways.
Here are a few guidelines you need to follow to get it right:
- Put downspouts in a hidden location to ensure that they don’t detract from your home’s overall look You can camouflage them with paintwork if no convenient hiding spots are available.
- Place downspouts in areas with the least amount of obstructions (electrical wires, hose bibs, sidewalks, etc.)
- Install downspouts near areas of the roof that drain plenty of water.
- If the gutter is at least 50 feet long, put a slope in both directions starting from the middle.
- Make sure that the downspout locations are at least 20 feet apart.
Step Four: Assemble and Prepare the Gutters
Some DIYers, and even some professionals, take to assembling the gutters after they’ve gone up the ladder to work on the roof. This is a dangerous practice that we don’t recommend.
It’s always better to assemble the gutters on the ground, not when you’re up there. Not only is it safer, but you’ll find that the process of installation becomes easier as well.
The general rule of thumb is to place the gutters on the ground just below the fascia so you can easily visualize how they are going to be attached. Using your measurements as a reference point, cut the gutters according to the correct length with a hacksaw. Smooth out the edges by shaving away at them with a file.
Assemble the sections of the gutter by connecting the seams together. Apply a gutter sealant on the interior seams to ensure that the gutter is leak-proof.
Also, when installing the gutter flashing, don’t worry about overlapping some sections if they are necessary– at least as long as they don’t compromise the system in some way.
Step Five: Add the Outlets and the Downspouts
Go over the sketch you made in step 2 and cut a downspout tube for each designated location. To determine the right dimensions for each tube, calculate the distance of your home’s corner to the location of the downspout as it appears on the sketch. Using the downspout tubes’ as a reference point, you can extrapolate and calculate the measurement of the gutters as well as the downspout outlet.
Step Six: Set the proper slope
Mark the slope by driving a nail at the designated spot below the gutter. Measure the distance from this nail to the bottom of the fascia board. Subtract 1/32 inch for every 10 feet of gutter and then note down the new total at the bottom end of the gutter run. Drive a nail at this spot and then snap a chalk line between the two nails. That chalk line marks the gutter slope.
Step Seven: Attach the gutters
With the chalk line serving as your reference point, attach the outlets to the fascia board with a power drill. Do the same for the gutter sections, but this time while using hidden fasteners for every 24 inches along the entire length.
Step Eight: Attach the downspouts
Start with one of the elbows as you attach the downspouts. You can keep them anchored by securing a bracket at the top of the wall and another one near the foundation. To divert water away from the foundation, attach a side elbow and then install a splash guard at the bottom.
Step Nine: Install the gutter flashing
Attach a rubber liner along the inside of the gutter and then add the flashing along the gutter’s edge to seal the liner. Add a strip of rubber on top of the flashing and you’re all set.
Getting Quotes from Competing Gutter Contractors
If the problem with your gutters have come to a point where even your considerable DIY skills aren’t enough, then it’s high time that you hire the services of a professional gutter contractor.
Sometimes, you need to leave it to the professionals.
But before you hire a gutter contractor who can fix your gutter leak, here’s a piece of advice: Get at least 4 quotes from competing gutter contractors.
For one thing, having many options to choose from puts you in a better position in finding a competitive contractor who will charge you a fair price.
Granted, it takes time to find the right contractor. Also, most contractors will charge you for a quote so you need to have a bit of money on the side as well.
But is it time and money well spent? You bet your bottom dollar it is!
But it gets better.
Thanks to our database comprising the best contractors in the U.S., you can receive itemized quotes from competing gutter contractors in a matter of minutes for free!
All you need to do is sign the form you see on this page, and you’re all set!
No commitments. No BS. If the quotes we send you aren’t to your liking, you are well within your right to ignore them.
Either way, this is the first big step to finding the contractor who will solve your gutter woes. Best of luck!